CloudPe Cloud provides a straightforward way to back up your volumes to ensure data safety and recovery. Here’s a simple guide based on the provided images:
Step 1: Navigate to the Volumes Section

- Log in to your CloudPe Cloud account.
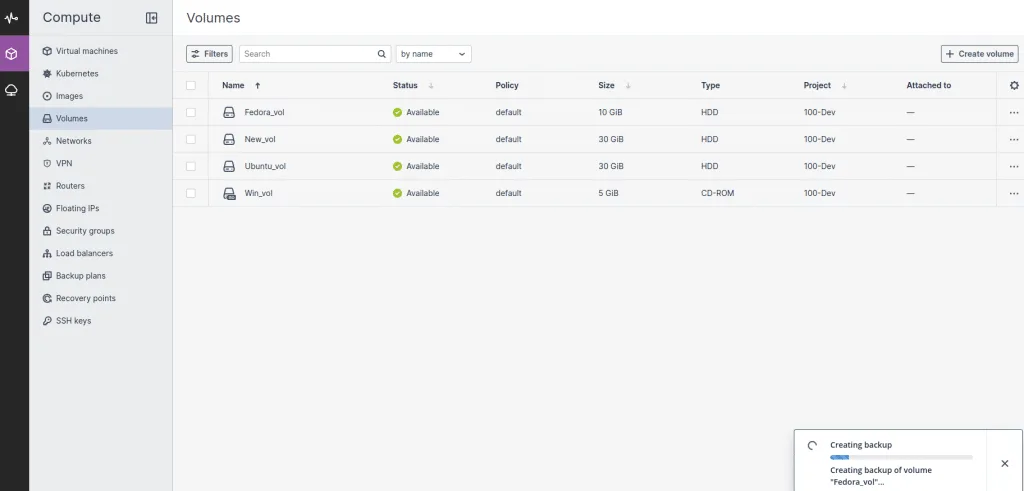
- In the left-hand menu, click on “Volumes” under the Compute section.
You will see a list of volumes, as shown in the image.
Step 2: Select the Volume for Backup
- Identify the volume you want to back up. For example, in the image, the volume “Fedora_vol” is selected.
- Click on the three-dot menu next to the selected volume.
- From the dropdown menu, choose “Create backup now”.
Step 3: Backup Creation Process.

- Once you select the “Create backup now” option, a progress notification will appear in the bottom-right corner, indicating that the backup process has started.
Example: “Creating a backup of volume ‘Fedora_vol'”. - Wait for the process to complete. The system ensures that the data is securely backed up.
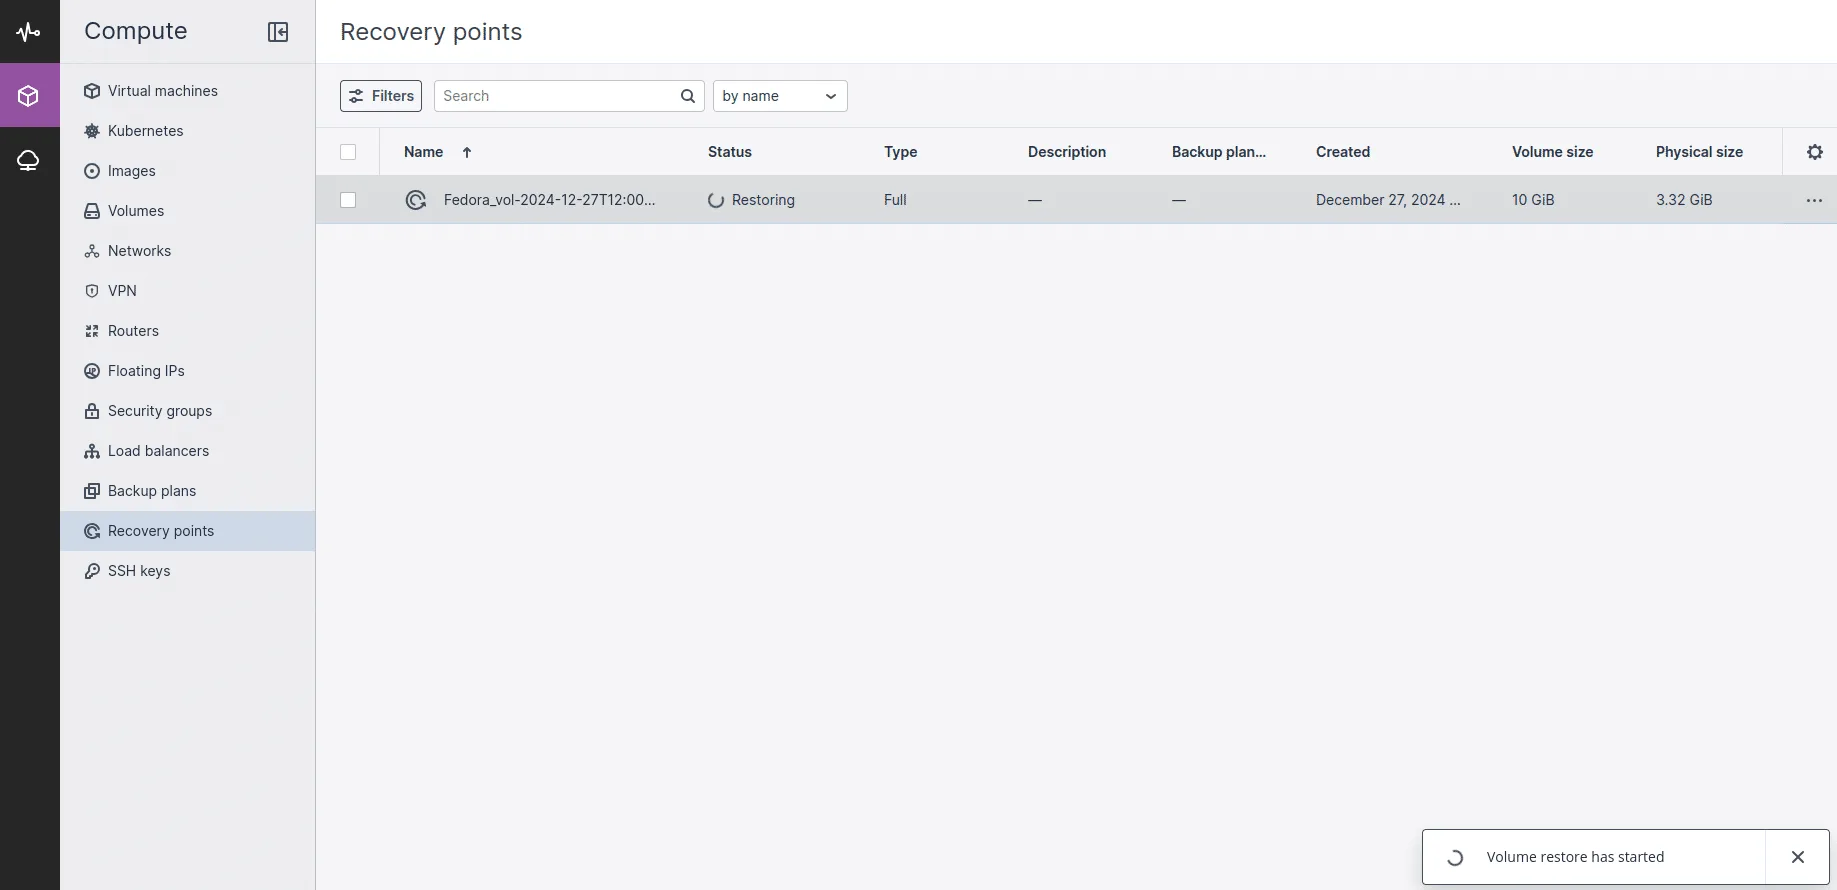
Step 4: Click on “Recovery Points” to view all available recovery points for restoration.

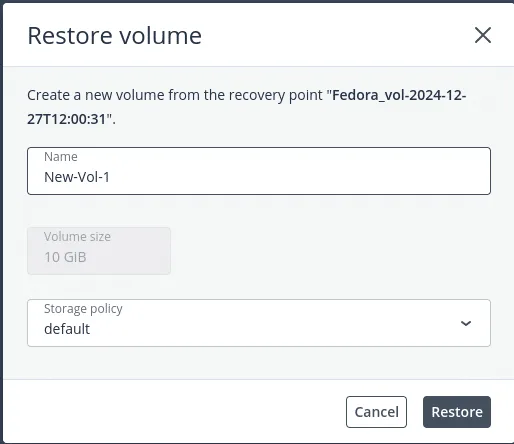
Step 5: Select the image that you want to restore and click Restore volume

Step 6: When you click on “Restore Volume,” you will need to create a new volume, choose the storage policy, and then click “Restore.”

Step 7: Volume restore process

Now, you will able to see that the Volume restore process is started