With Virtual Private Network (VPN) as a service, self-service users can extend virtual networks across public networks, such as the Internet. To connect two or more remote endpoints, VPNs use virtual connections tunneled through physical networks. To secure VPN communication, the traffic that flows between remote endpoints is encrypted. The VPN implementation uses the Internet Key Exchange (IKE) and IP Security (IPsec) protocols to establish secure VPN connections and is based on the strongSwan IPsec solution.
To better understand how a VPN works, consider the following example: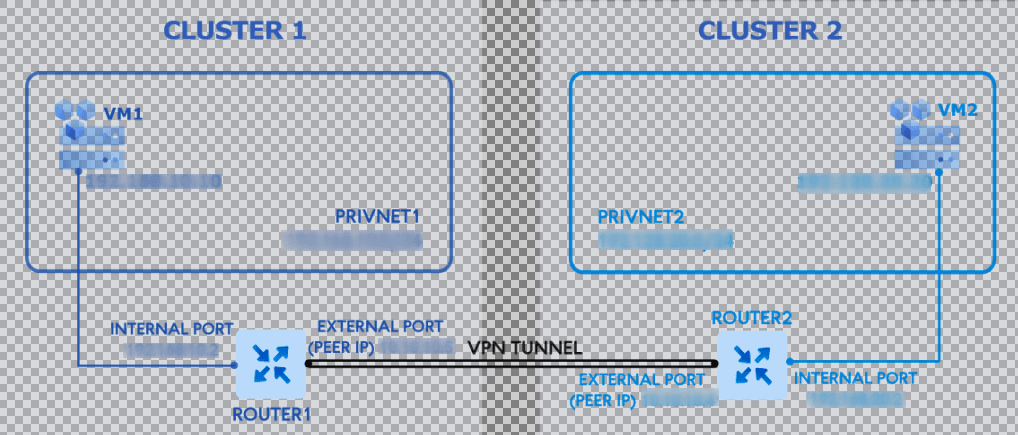
- In cluster 1, the virtual machine VM1 is connected to the virtual network privnet1 via the network interface with IP address 192.168.10.10. The network privnet1 is exposed to public networks via the router router1 with the external port.
- In cluster 2, the virtual machine VM2 is connected to the virtual network privnet2 via the network interface with the IP address. The network privnet2 is exposed to public networks via the router router2 with the external port.
- The VPN tunnel is created between the routers router1 and router2 that serve as VPN gateways, thus allowing mutual connectivity between the networks privnet1 and privnet2.
- The virtual machines VM1 and VM2 are visible to each other at their private IP addresses. That is, VM1 can access VM2 at and VM2 can access VM1
For key exchange between communicating parties, two IKE versions are available: IKE version 1 (IKEv1) and IKE version 2 (IKEv2). IKEv2 is the latest version of the IKE protocol and it supports connecting multiple remote subnets.
In the example above:
- VPN1 uses the IKEv1 and connects the network network1 with the network3.
- VPN2 uses the IKEv2 and connects the network network2 with the two networks network4 and network5.
Creating VPN Connections
Limitations:
- A virtual machine must have no floating IP addresses assigned to its private network interface. Otherwise, the VM traffic cannot be routed through a VPN tunnel.
Prerequisites:
- You have a virtual router created, as described in Managing Virtual Routers.
- The virtual router connects the physical network with the virtual networks that you want to be exposed to.
- Networks that will be connected via a VPN tunnel must have non-overlapping IP ranges.
Creating VPN Connection
- On the VPN screen, click Create VPN.
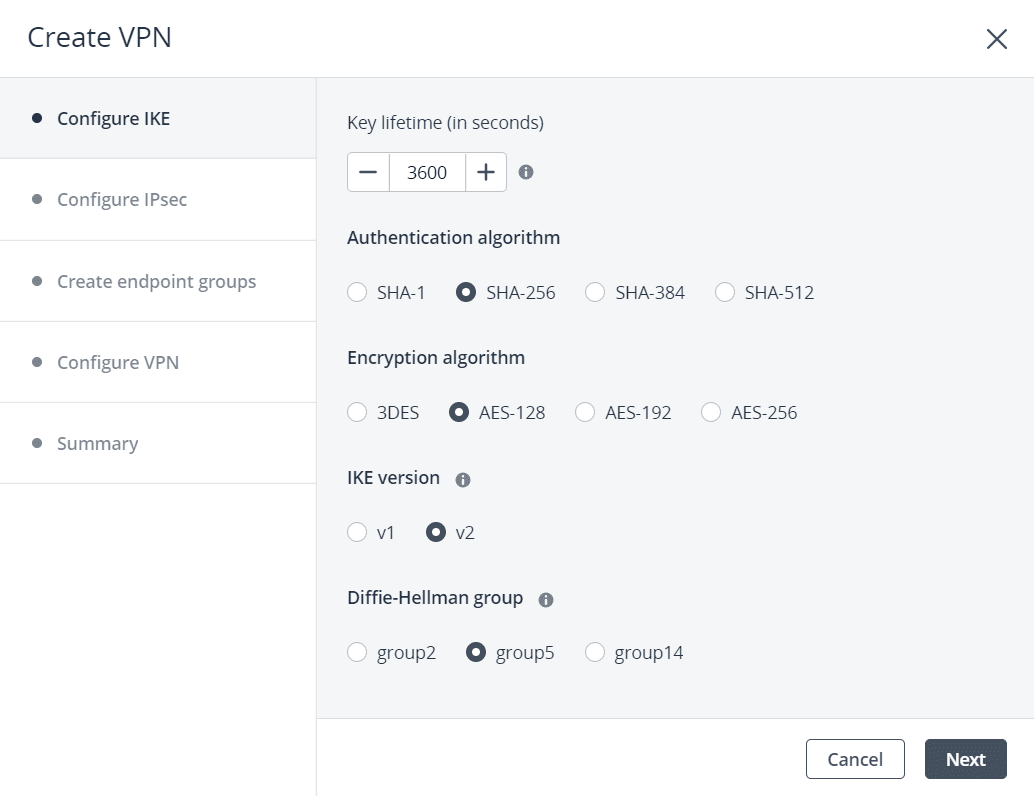
- On the Configure IKE step, specify parameters for the IKE policy that will be used to establish a VPN connection. You can choose to use an existing IKE policy or create a new one. For the new IKE policy, do the following:
- Specify a custom name for the IKE policy.
- Specify the key lifetime, in seconds, that will define the rekeying interval. The IKE key lifetime must be greater than that of the IPsec key.
- Select the authentication algorithm that will be used to verify the data integrity and authenticity.
- Select the encryption algorithm that will be used to ensure that data is not viewable while in transit.
- Select the IKE version 1 or 2. Version 1 has limitations, for example, it does not support multiple subnets.
- Select the Diffie-Hellman (DH) group that will be used to build the encryption key for the key exchange process. Higher group numbers are more secure but require additional time for the key to compute.
- Click Next.
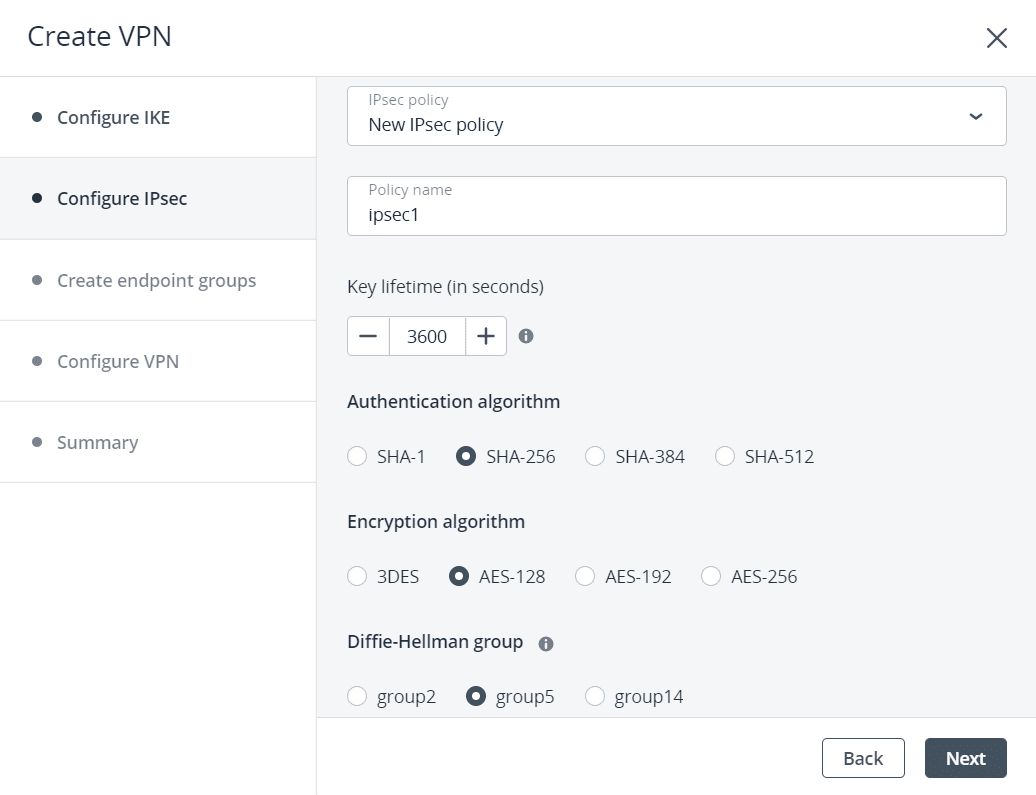
- On the Configure IPsec step, specify parameters for the IPsec policy that will be used to encrypt the VPN traffic. You can choose to use an existing IPsec policy or create a new one. For the new IPsec policy, do the following:
- Specify a custom name for the IPsec policy.
- Specify the key lifetime, in seconds, that will define the rekeying interval. The IPsec key lifetime must not be greater than that of the IKE key.
- Select the authentication algorithm that will be used to verify the data integrity and authenticity.
- Select the encryption algorithm that will be used to ensure that data is not viewable while in transit.
- Select the Diffie-Hellman (DH) group that will be used to build the encryption key for the key exchange process. Higher group numbers are more secure but require additional time for the key to compute.
- Click Next.
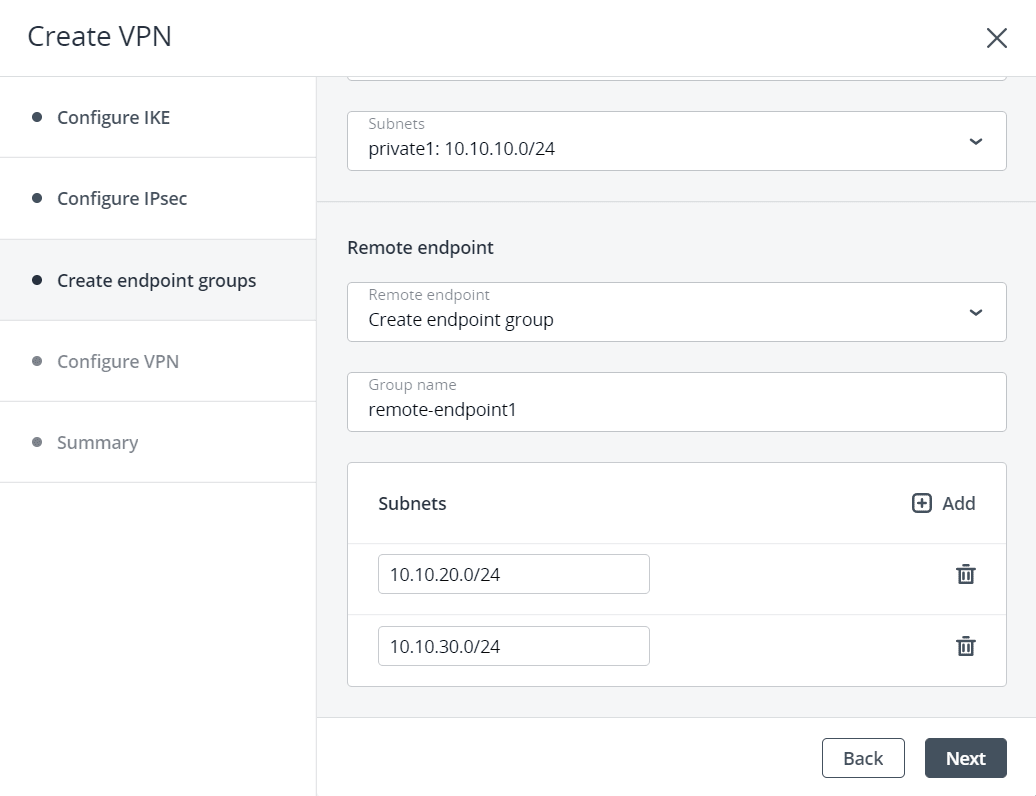
- On the Create endpoint groups step, select a virtual router and specify local and remote subnets that will be connected by the VPN tunnel. You can choose to use existing local and remote endpoints, or create new ones. For the new endpoints, do the following:
- Specify a custom name for the local endpoint, and then select local subnets.
- Specify a custom name for the remote endpoint, and then add remote subnets in the CIDR format.
- Click Next.
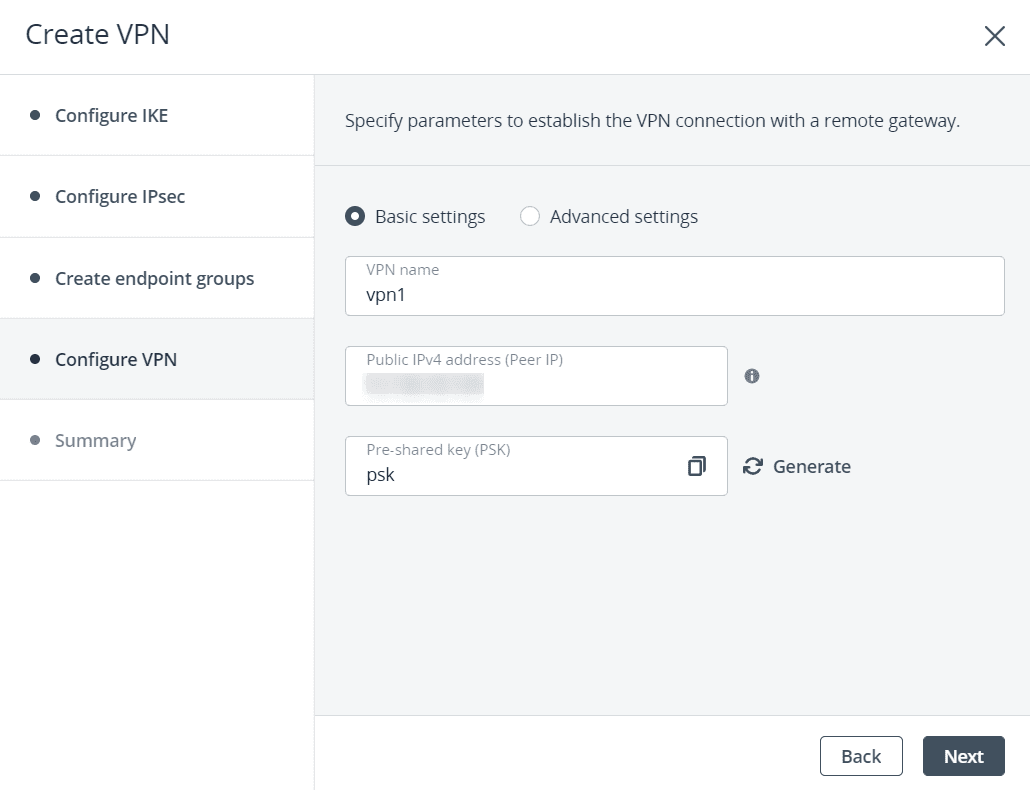
- On the Configure VPN step, specify the parameters to establish the VPN connection with a remote gateway:
- Specify a custom name for the VPN connection.
- Specify the public IPv4 address of the remote gateway, that is, the peer IP address.
- Generate the pre-shared key that will be used for the peer authentication.
- [Optional] If necessary, you can also configure additional settings by selecting Advanced settings and specifying the following parameters:
- The peer ID for authentication and the mode for establishing a connection.
- The Dead Peer Detection (DPD) policy, interval, and timeout, in seconds.
- Click Next. Click, Next.
- On the Summary step, review the configuration, and then click Create.
When the VPN connection is created, its status will change from “Pending creation” to “Down”. The connection will become active once the VPN tunnel is configured by the other VPN party and the IKE authorization is successful.
Editing VPN Connections
After a VPN connection is created, you can change its endpoint groups and VPN settings at any time.
Limitations:
- You cannot change the virtual router and security policies used to establish a VPN connection.
Prerequisites:
- A VPN connection is created, as described in Creating VPN Connections.
Edit VPN Connection
- On the VPN screen, click a VPN connection to modify.
- On the connection right pane, click Edit.
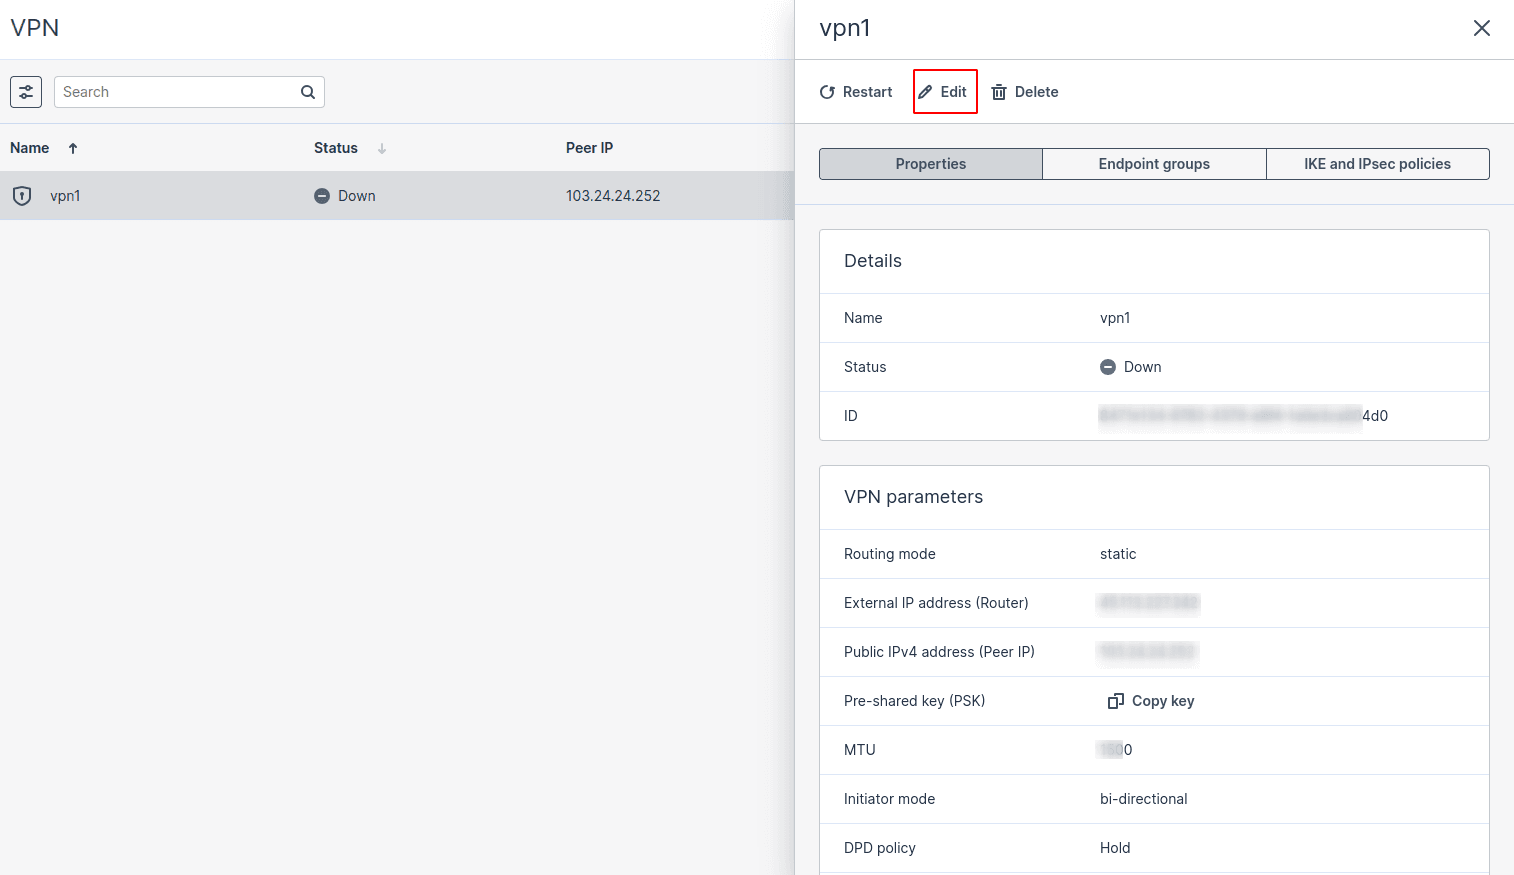
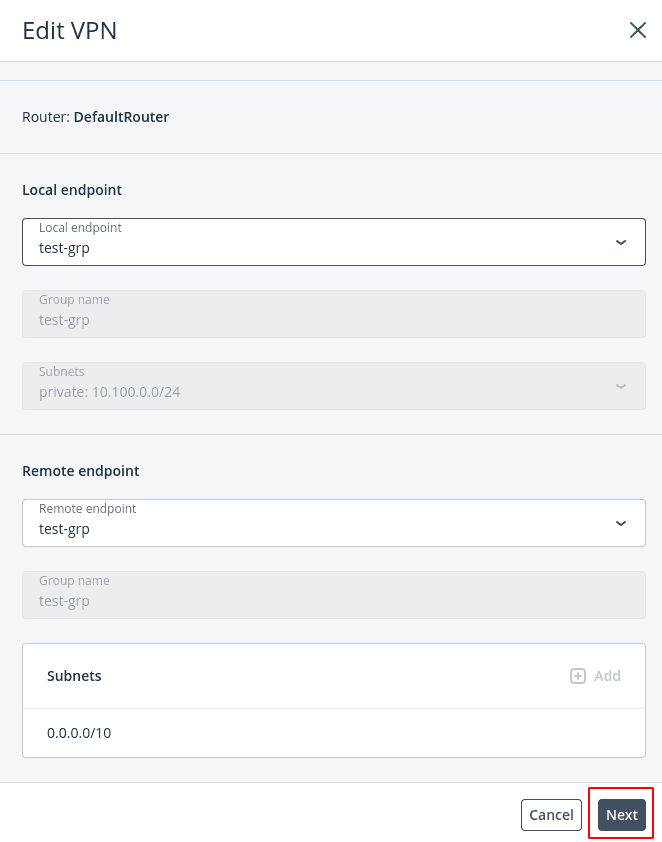
- In the Edit VPN window, configure local and remote endpoints, if required, and then click Next.
- In the next step, change VPN parameters such as the VPN connection name, peer IP address, and PSK key. If necessary, you can also configure additional settings by selecting Advanced Settings and editing the required parameters.
- Click Save to apply your changes.
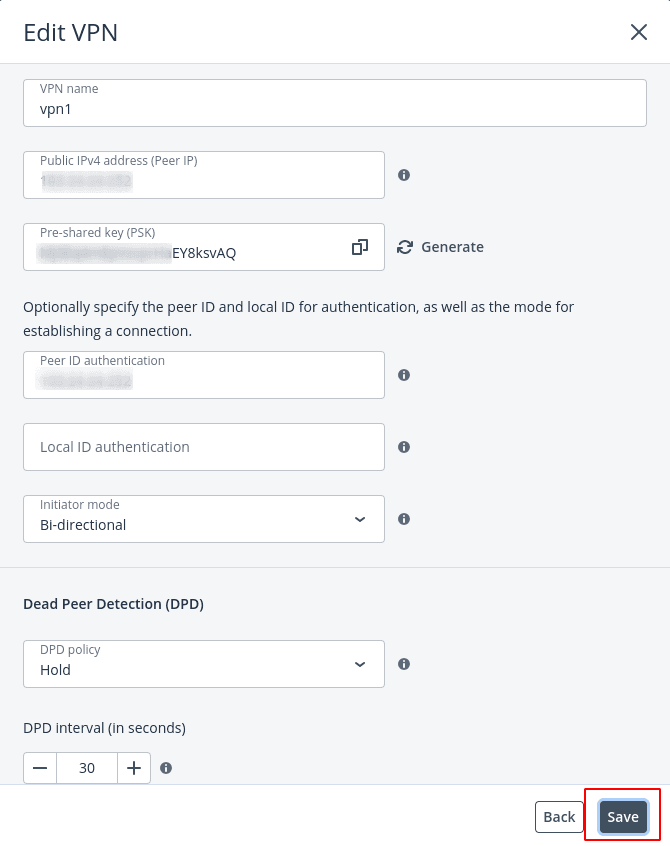
After you update the connection parameters, its status will change to “Down”. The connection will re-initiate once the parameters are similarly updated by the other VPN party.
Restarting and Deleting VPN Connections
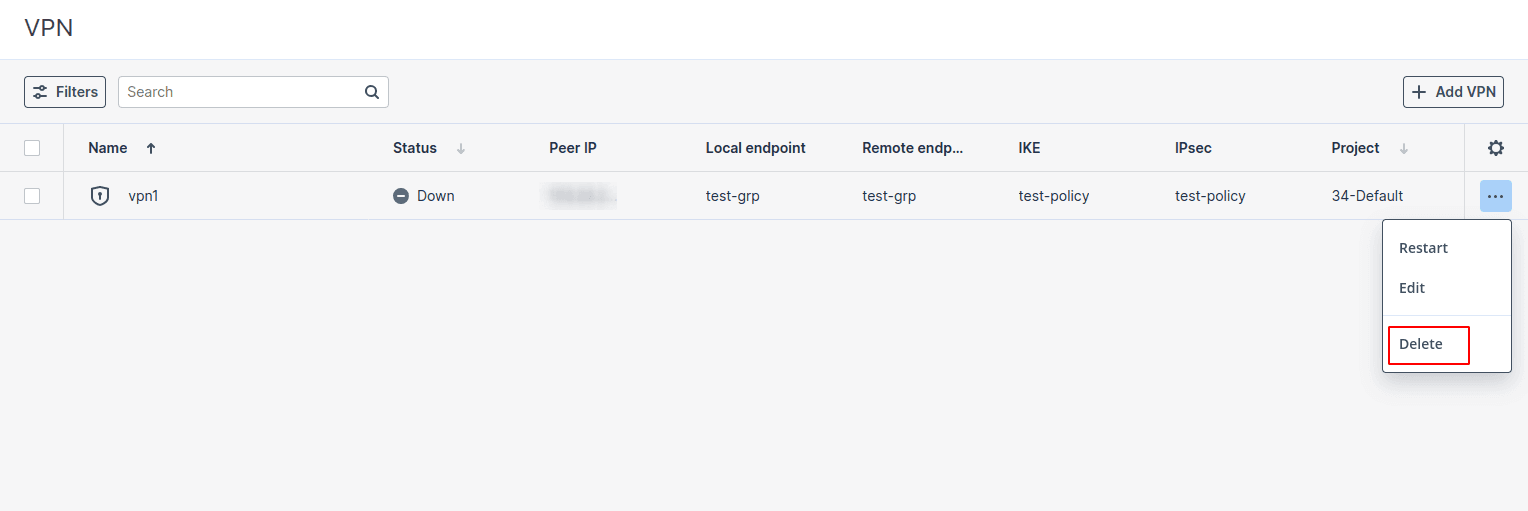
You can forcefully re-initiate a VPN connection by manually restarting it. When you delete a VPN connection, you also delete the IKE and IPsec policies and endpoint groups that were created during the VPN creation.
Prerequisites:
- A VPN connection is created, as described in Creating VPN Connections.
Restarting VPN Connection
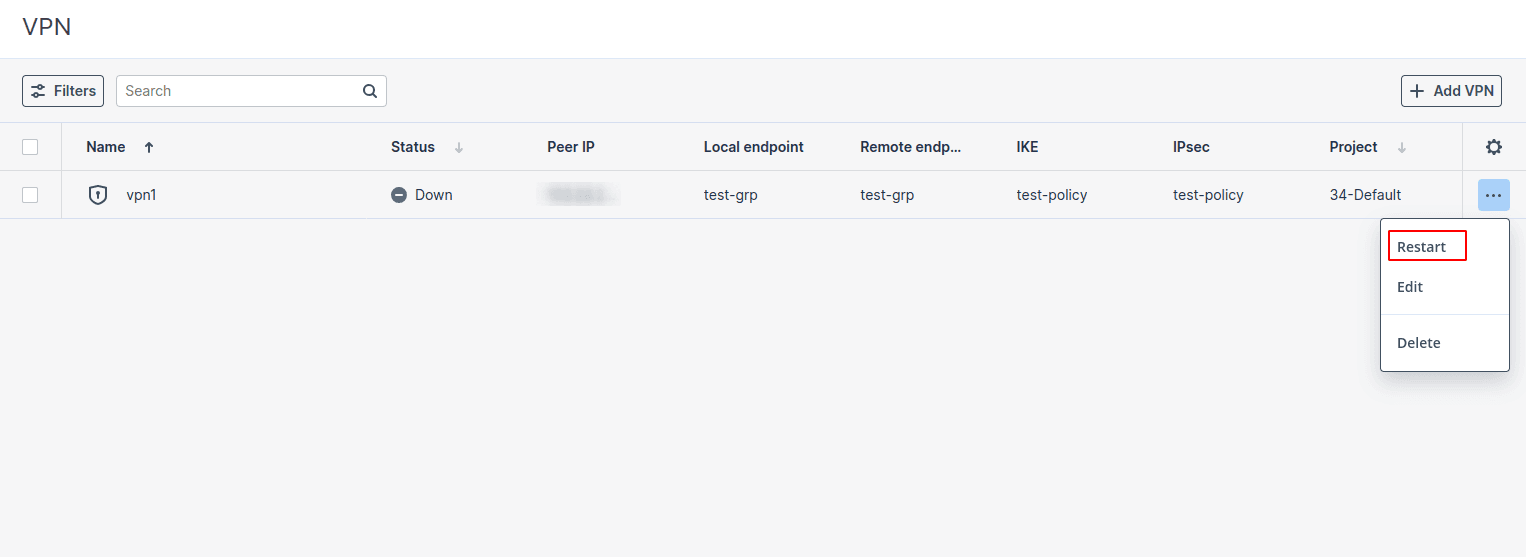
- On the VPN screen, click a VPN connection to restart.
- On the connection right pane, click Restart.
- Click Restart VPN in the confirmation window.
Deleting VPN connection
- On the VPN screen, click a VPN connection to delete.
- On the connection right pane, click Delete.
- Click Delete in the confirmation window.
