CloudPe users can create and manage Virtual Machines (VMs) programmatically using API. This guide walks through the complete process of creating a VM using OpenStack API, including selecting a flavor, an image, a network, and booting from a volume.
Prerequisites: You should have the API authentication credentials (Auth Token). To know more about how to get the Auth Token, Click Here for more details.
Step 1: Select a Flavor
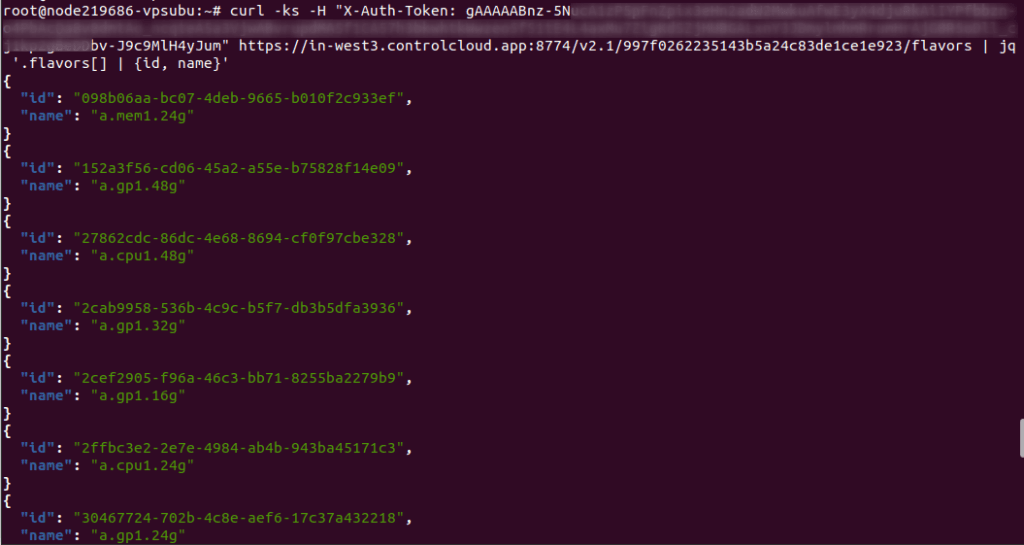
A flavor defines the VM’s hardware specifications (CPU, RAM, Disk). You can list available flavors using:
curl -ks -H "X-Auth-Token: YOUR_TOKEN" "https://in-west3.controlcloud.app:8774/v2.1/<project-id>/flavors" | jq '.flavors[] | {id, name}'This will return a list of flavors. Choose the required flavor ID.
e.g. :
“id”: “57d13e51-9c7d-49c1-9914-8febb9aadbfb”,
“name”: “a.gp1.4g”
Step 2: Select an Image
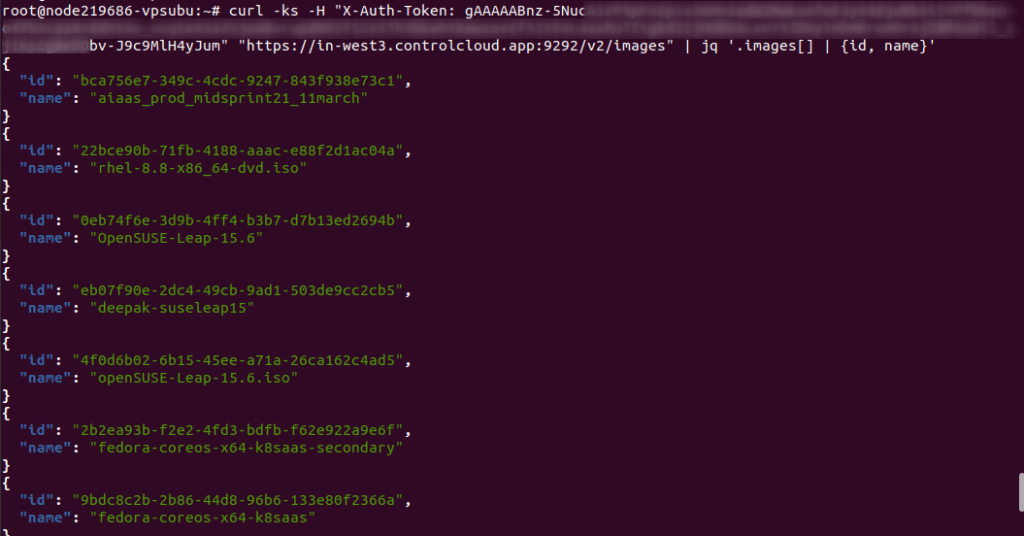
To list available images:
curl -ks -H "X-Auth-Token: YOUR_TOKEN" "https://in-west3.controlcloud.app:9292/v2/images" | jq '.images[] | {id, name}'Pick an image ID from the output.
e.g. :
“id”: “15e0ac15-0b12-4a38-abda-8d7625acace0”,
“name”: “AlmaLinux 9”
Step 3: Create a Boot Volume
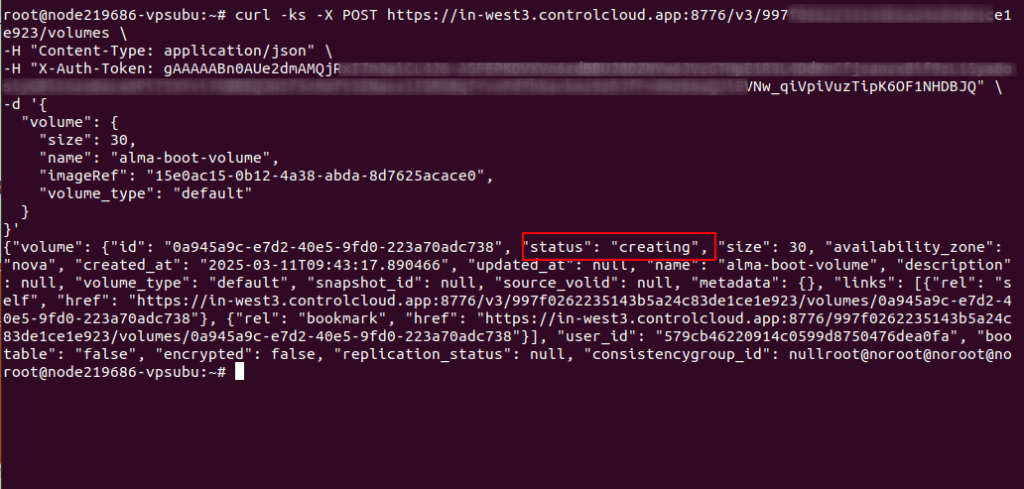
Create a Bootable Volume from an Image.
curl -ks -X POST https://in-west3.controlcloud.app:8776/v3/YOUR_PROJECT_ID/volumes \
-H "Content-Type: application/json" \
-H "X-Auth-Token: YOUR_TOKEN" \
-d '{
  "volume": {
    "size": 30,                    # Volume size in GB (adjust as needed)
    "name": "alma-boot-volume",    # Mention name for the new volume
    "imageRef": "YOUR_IMAGE_ID",   # The Image ID to create the volume
    "volume_type": "default"       # Use the default volume type (or specify)
  }
}'
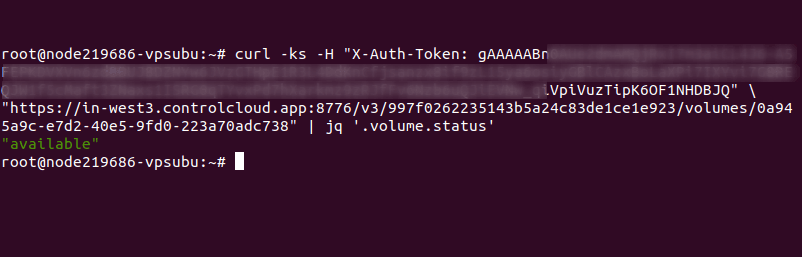
Wait Until the Volume is Ready. Run the following command to check the volume status:
curl -ks -H "X-Auth-Token: YOUR_TOKEN" \
"https://in-west3.controlcloud.app:8776/v3/YOUR_PROJECT_ID/volumes/NEW_VOLUME_ID" | jq '.volume.status'
Step 4: Select a Network
To get available networks:
curl -ks -H "X-Auth-Token: YOUR_TOKEN" \
"https://in-west3.controlcloud.app:9696/v2.0/networks" | jq '.networks[] | {id, name}'
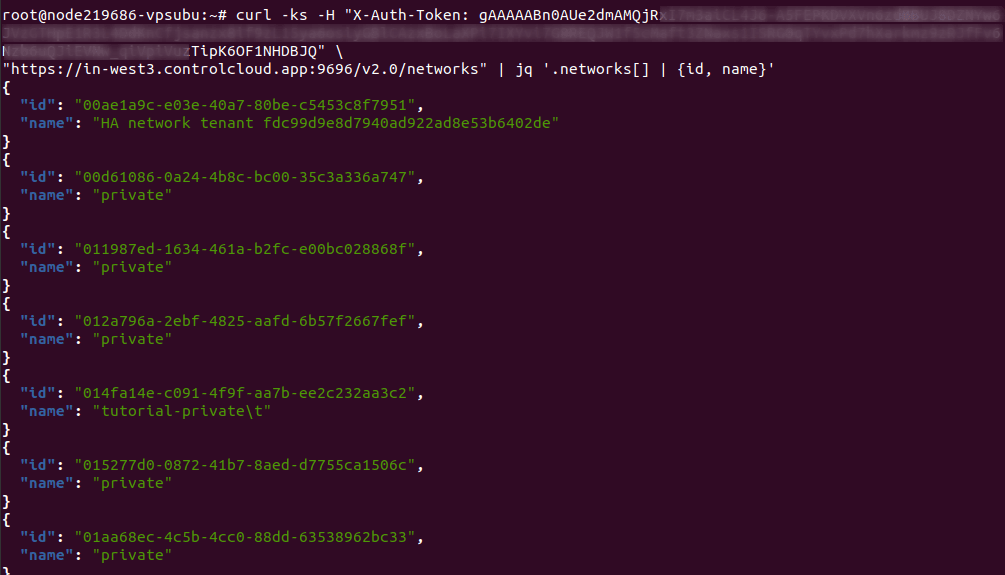
Select the ID of a Public IP from the list to attach to your VM so you can connect via SSH.
If using a private network, you need to attach the floating IP.
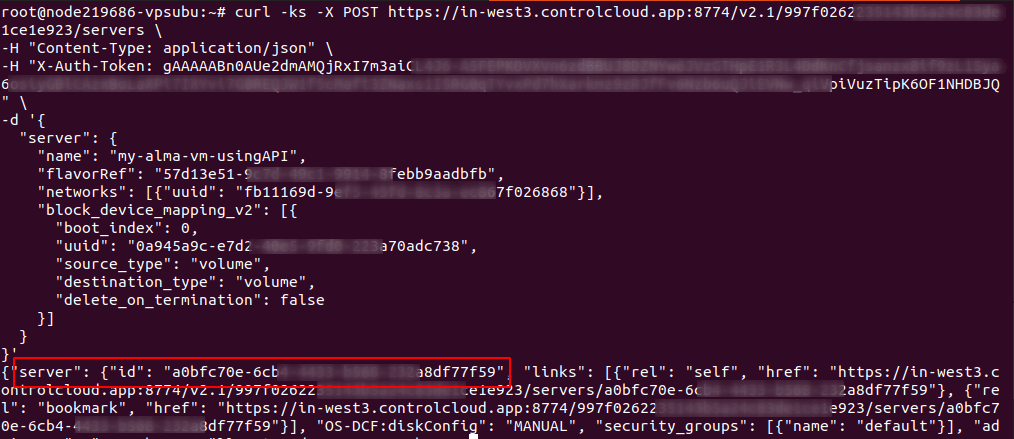
Step 5: Create the VM
Now, create a VM using the selected flavor, network, and boot volume:
curl -ks -X POST https://in-west3.controlcloud.app:8774/v2.1/<project-id>/servers \
-H "Content-Type: application/json" \
-H "X-Auth-Token: YOUR_TOKEN" \
-d '{
  "server": {
    "name": "my-alma-vm-usingAPI",               # Mention VM Name
    "flavorRef": "YOUR_FLAVOR_ID",               # Mention Flavor ID
    "networks": [{"uuid": "YOUR_NETWORK_ID"}],   # Mention Network ID
    "block_device_mapping_v2": [{
      "boot_index": 0,
      "uuid": "YOUR_VOLUME_ID",                  # Mention Volume ID
      "source_type": "volume",
      "destination_type": "volume",
      "delete_on_termination": false
    }]
  }
}'
Step 6: Check VM Status
Check the status of the newly created VM:
curl -ks -H "X-Auth-Token: <your-auth-token>" \
https://in-west3.controlcloud.app:8774/v2.1/<project-id>/servers | jq '.servers[] | {id, name, status}'
Possible statuses:
BUILD → VM is being created.
ACTIVE → VM is ready.
ERROR → Something went wrong.
Troubleshooting:
If the VM is stuck in “BUILD” state, Wait for a few minutes and check again.
If it remains stuck, check the compute logs in OpenStack.
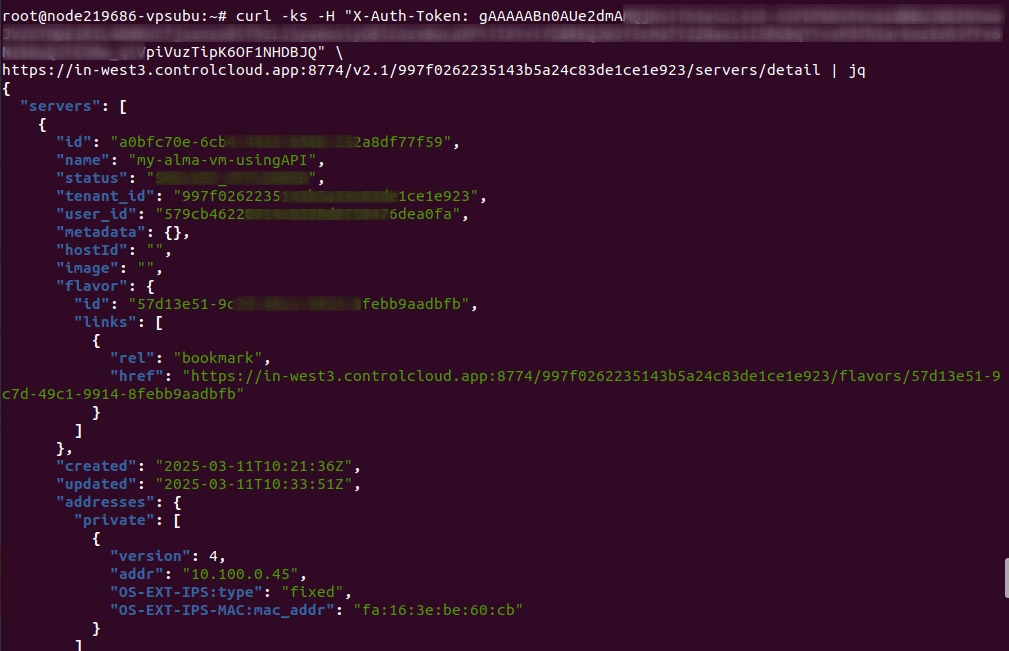
Step 7: List Detailed Server Information
If you want detailed information about each server:
curl -ks -H "X-Auth-Token: <your-auth-token>" \
https://in-west3.controlcloud.app:8774/v2.1/<project-id>/servers/detail | jq
Conclusion:
This guide covered:
- Selecting a flavor, image, and network.
- Creating a boot volume.
- Deploying a VM using OpenStack API.
- Checking VM status.
Using these steps, you can fully automate VM creation in OpenStack.