Awards & Recognition
Supporting Digital Transformation for India's high growth startups, enterprises, and businesses.


Everything you need to scale
Build, deploy, and grow with India's most reliable cloud — from VMs to GPUs to managed Kubernetes.
GPUs On Demand
Train and fine-tune your models to run cost-effective inference tasks.
Kubernetes
Deploy secure, fully managed Kubernetes clusters with ease. Automate node provisioning and scale containerized applications.
S3 Object Storage
Keep vast volumes of data safe with 99.9% persistence for backups and data lakes.
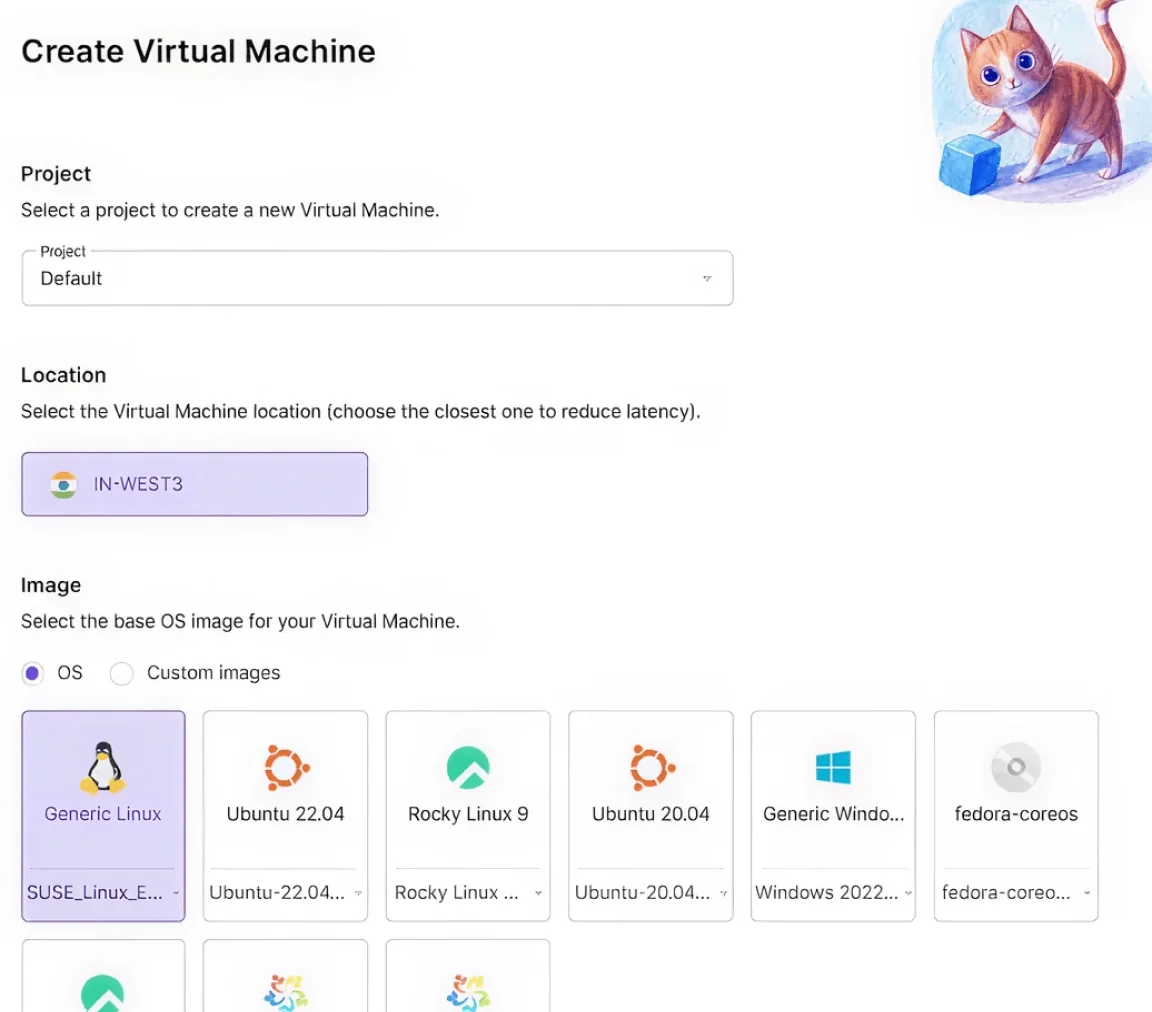
Virtual Machines
Launch high-performance NVMe cloud servers in India within a minute.

Networking (VPC)
Isolate workloads with high bandwidth private networks and zero east-west traffic.
Managed Load Balancers
Distribute traffic seamlessly for high performance and availability.
Built for Production, Engineered for Performance
Faster Compute
Faster Compute
Our cloud configurations consistently outperform against "hyperscalers" with similar infrastructure configurations.
AI/ML Workloads
Workloads
Access GPUs on demand and accelerate LLM training and AI inference.
IOPS Storage
IOPS Storage
Our NVMe SSD storage ensures no bottleneck for databases.
Private Network
Private Network
Get Ultra-low latency with centralised Mumbai data centers.
Managed Services
Managed Services
Our Cloud team will handle infrastructure monitoring and optimisation so you can focus on your core workflows.
Less Expensive
Less Expensive
Transparent pricing dramatically reduces Total Cost of Ownership (TCO).
25%
Faster Compute
Faster Compute
Our cloud configurations consistently outperform against "hyperscalers" with similar infrastructure configurations.
Powering Every Stage of Growth
Whether you're a small startup or a big enterprise, CloudPe scales with your business while adapting to your needs.
Ready To Get Started?
Deploy your first instance in under 60 seconds with personalized guidance.
Stop Overpaying for your Cloud Infrastructure
Businesses overspend on their cloud infrastructure because of hidden fees, complex pricing, and performance issues. We fixed that.
The problem
Unpredictable Costs
Costs you can't predict, fees you didn't expect.
CloudPe solution
Transparent Pricing
Transparent pricing, pay only for what you use.
The problem
Performance Issues
Inconsistent performance due to shared resources.
CloudPe solution
Dedicated Resources
No shared resources, always-on performance.
The problem
Complex Platforms
Complex platforms, complicated setup, no clear owner.
CloudPe solution
Simple Architecture
Simple architecture, easy setup, complete documentation.
The problem
Unclear Ownership
No accountability, support with no resolution.
CloudPe solution
Single Point of Contact
One owner, real 24/7 support.
30%
Cost Savings
<30ms
Latency
24/7
Cloud Experts
Resources & Support
Everything you need to build, deploy, and scale with confidence.
Technical Proficiency
AI-based anomaly detection with continuous infrastructure monitoring.
Secure, Scalable Cloud. 100% Hosted in India
Keep your data within national borders with our rapidly expanding network of local data centers. Get millisecond latency from North to South.
Navi Mumbai (Dual Zones)
Operate mission-critical workloads from our two active data centers in India's financial capital. Perfect for high-availability setups.
New Delhi (Launching March 2026)
Expanding our robust infrastructure in the National Capital Region. Deploy applications closer to North Indian users for zero-lag response times.
Chennai (Coming Soon)
Adding to our Pan-India network. Our upcoming Chennai facility will enable true multi-region disaster recovery (DR) and edge delivery for the southern india users.
Navi Mumbai (Dual Zones)
Operate mission-critical workloads from our two active data centers in India's financial capital. Perfect for high-availability setups.
What Our Customers Say
Real feedback from teams building on CloudPe — India's cloud, built for India.
"CloudPe is now well developed and working smoothly without interruptions. The support team helped deliver Terraform implementation on time — Mr. Swapnil Satpute played a key role in coordinating with the team. The platform has been reliable for our production workloads and we're excited about the upcoming auto-scaling feature."
Saiprasad Wani
Advarisk
"I used CloudPe for deployment and the server is ideal. Great query response time. Special thanks to Mr. Rushikesh for his excellent post-sale support."
Keshav Madan
AXRVERSE Global Pvt. Ltd.
Ready to Migrate?
Built in India, for India. Deploy high-performance cloud infrastructure in less than 60 seconds + get support from the cloud experts.
Blog: Insights and Tutorials
Insights, announcements, and cloud knowledge.