How to add volume to VM
After attaching the volume please run the below commands to print the partitions, partion types and available disks on the VM.
Device Path May Vary by Operating System
| OS / Disk Type | Example Device Name |
|---|---|
| Ubuntu / Debian | /dev/sdb, /dev/sdc |
| CentOS / RHEL / AlmaLinux | /dev/vdb, /dev/xvdb |
| NVMe-based disks | /dev/nvme1n1 |
| Windows | Appears in Disk Management |
Always confirm the correct disk using lsblk or fdisk -l before performing any operation.

df -HT
lsblk
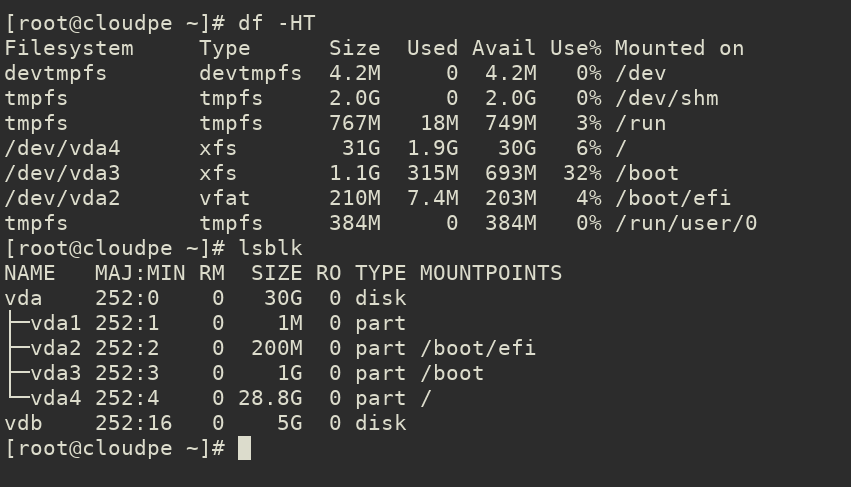
in the above image, we have vdb volume attached to the VM.
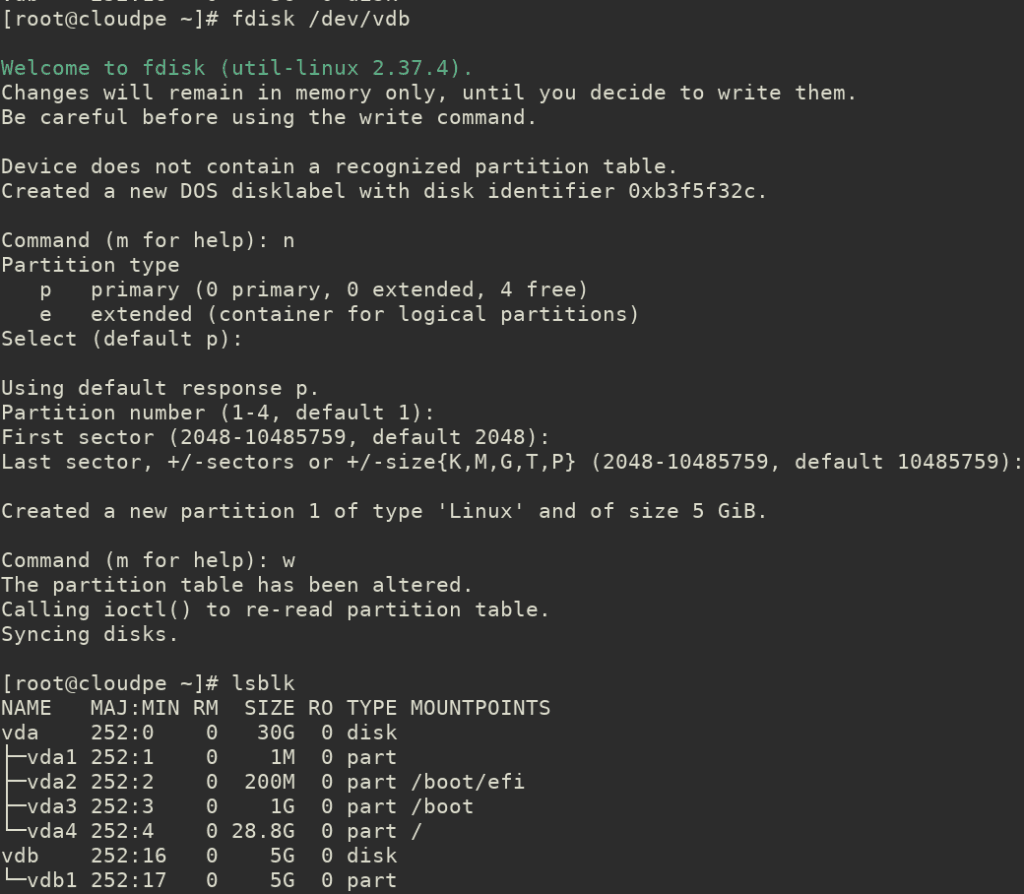
1. Create a Partition on the Disk
Launch fdisk for the disk:fdisk /dev/vdb
Inside fdisk:
Press n to create a new partition.
Choose p for a primary partition.
Accept the default values for the first and last sectors (or customize as needed).
Press w to write the changes and exit.
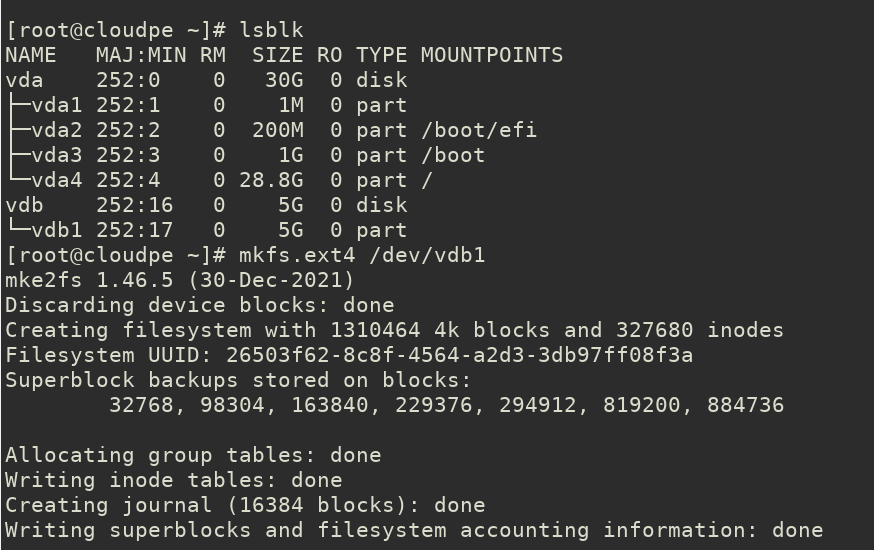
2. Format the Partition
Format the new partition (/dev/vdb1, assuming the first partition is created) with a filesystem like ext4 or xfs.
For ext4
mkfs.ext4 /dev/vdb1
For xfs
mkfs.xfs /dev/vdb13. Create a Mount Point
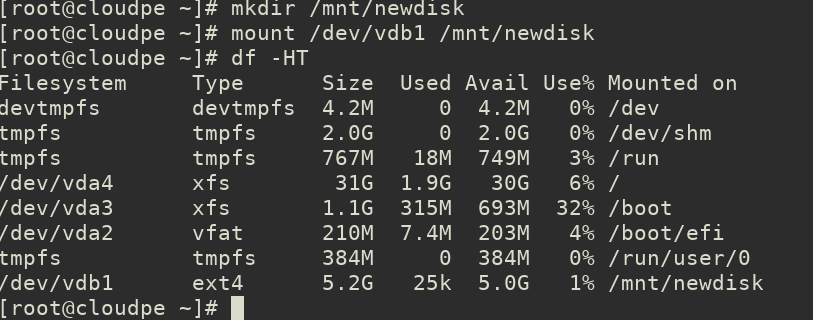
Create a directory where you want to mount the new partition:
mkdir /mnt/newdisk4. Mount the Partition
Mount the partition to the directory:
mount /dev/vdb1 /mnt/newdisk
5. Verify the Mount
df -HT
6. Make the Mount Permanent
To ensure the partition mounts automatically on reboot:
1. Get the UUID of the partition:
blkid /dev/vdb1

Example output:
[root@cloudpe ~]# blkid /dev/vdb1
/dev/vdb1: UUID="26503f62-8c8f-4564-a2d3-3db97ff08f3a" TYPE="ext4" PARTUUID="b3f5f32c-01"
2. Edit /etc/fstab and add the following line:
Replace your-uuid-here with the actual UUID and ext4 with your chosen filesystem.
UUID=26503f62-8c8f-4564-a2d3-3db97ff08f3a /mnt/newdisk ext4 defaults 0 0

  3.Test the fstab configuration:
mount -aYou’re done! The disk is now partitioned, formatted, mounted, and set up for persistent mounting.
7. Volume Hot-Plug Safety Guidelines
CloudPe allows attaching and detaching volumes while the VM is running.
However, improper detachment can cause data corruption.
Best Practices:
- Always unmount the volume before detaching:
umount /mnt/newdisk - Ensure no active read/write operations
- Flush pending writes:
sync - Verify the disk is not mounted:
lsblk - Detach the volume only after unmounting
Detaching a mounted volume may result in filesystem corruption or data loss.