On Cloudpe, the Projects feature is designed to streamline infrastructure management by providing a dedicated workspace for virtual machines and team collaboration.
Key Benefits of Creating Projects:
- Environment Segregation:
Projects allow access to users/collaborators to separate environments based on their purpose. This ensures clear boundaries between workflows, making resource management and troubleshooting easier. - Team Collaboration:
Invite team members to a project and assign specific roles and permissions. Whether it’s granting access to developers or limiting privileges for observers, you can ensure secure collaboration tailored to your project needs. To learn more about the Teams feature, Click Here for more details.
To Create a Project:
Log in to the CloudPe Dashboard account using the URL.
1. Accessing the Project Selector
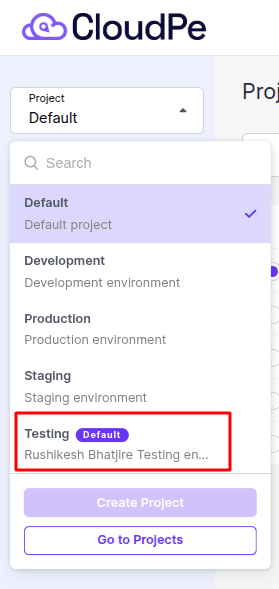
The Project dropdown sits at the top-left of the CloudPe dashboard, just below the logo. It shows your currently active project and lets you switch projects or create new ones without leaving your current page.
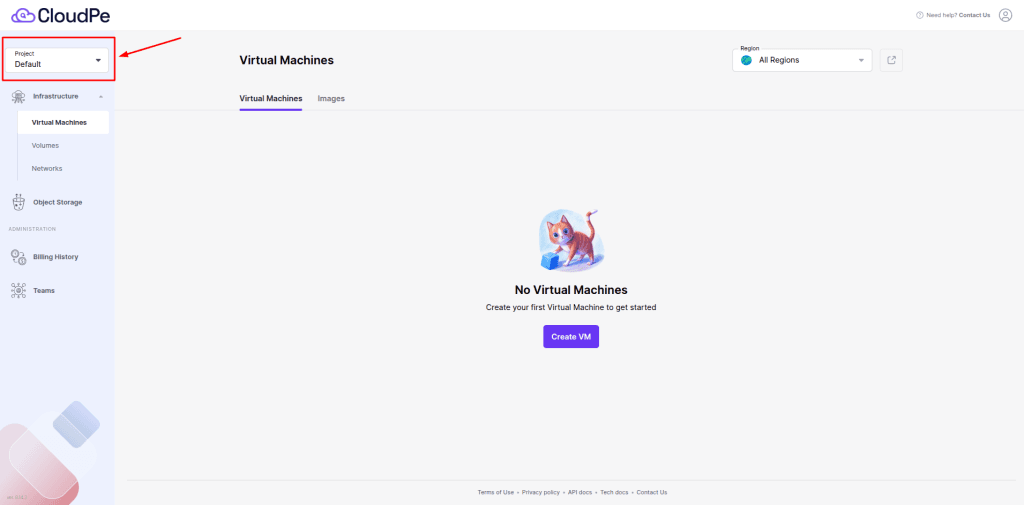
Clicking the dropdown opens a panel where you can:
- See all your projects (current one has a ✓ checkmark)
- Search for a project by name
- Create a new project
- Navigate to the full Projects page
2. Creating a New Project
Step 1: Click the Project dropdown at the top-left of the dashboard.
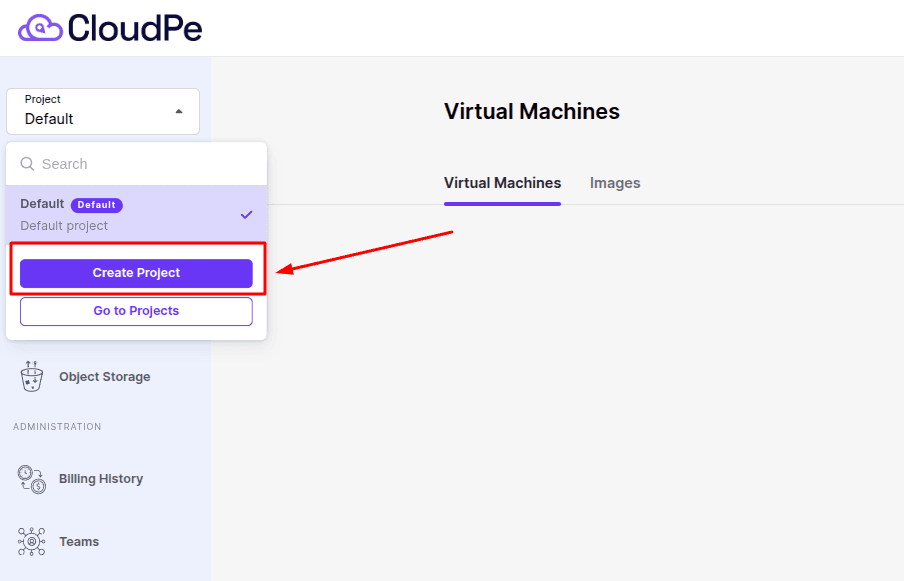
Step 2: Click the Create Project button (purple) inside the dropdown.

Step 3: Fill in the form:
| Field | Details |
|---|---|
| Name | Required. A short, descriptive name (e.g., Development, Production, Staging) |
| Description | Optional. Briefly explain what this project is for |
| Make Default | Toggle ON if you want this to become your default project |
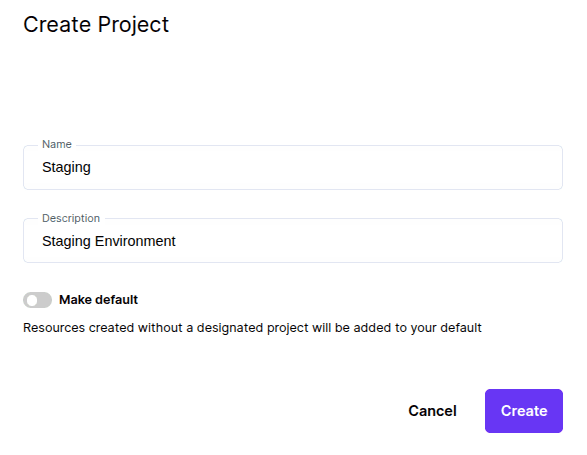
Step 4: Click Create. The project is created instantly and appears in your project list.
💡 Tip: Use consistent naming across your team — short environment-based names like dev, staging, prod work best.
ℹ️ Project Limit Note: CloudPe trial accounts can create up to 2 projects. After upgrading, CloudPe allows up to 5 projects per account by default. This limit can be increased based on your needs.
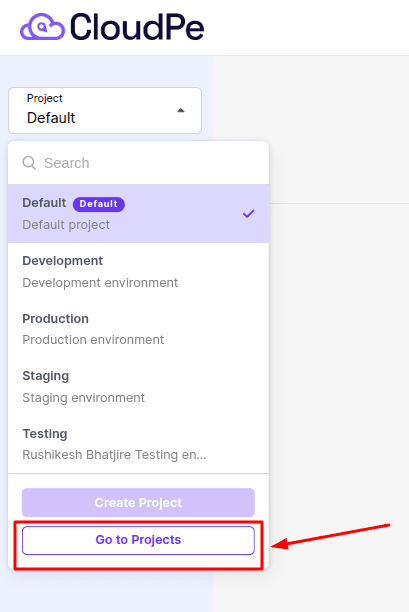
3. Viewing All Projects
To see and manage all your projects in one place, open the Project dropdown and click Go to Projects.
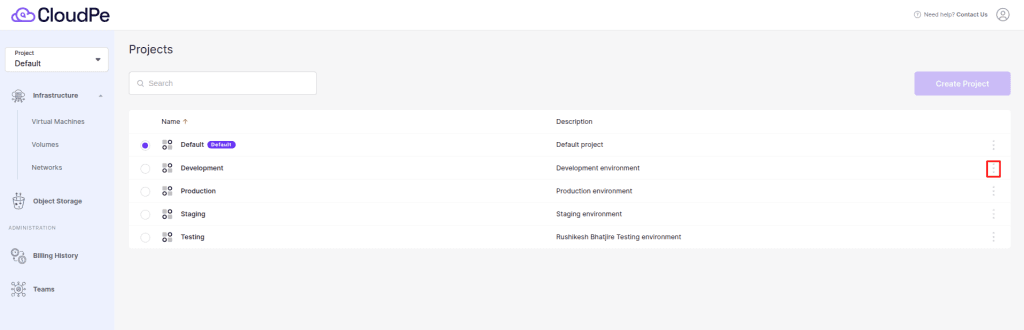
On the Projects page:
- Each row shows the project Name and Description
- The Default project has a purple badge next to its name
- The three-dot menu ⋮ on each row gives you Edit, Make Default, and Delete options
- Use the Search bar to filter projects by name
- Click Create Project (top-right) to add a new project directly from this page
ℹ️ Usage Note: Projects help organize workloads by environment or team, making it easier to review resource usage and manage infrastructure more effectively across different workloads.
4. Editing a Project
Step 1: On the Projects page, click the ⋮ menu at the right end of the project row you want to edit.
Step 2: Click Edit.

Step 3: The row becomes editable inline — update the Name and/or Description directly in the table.
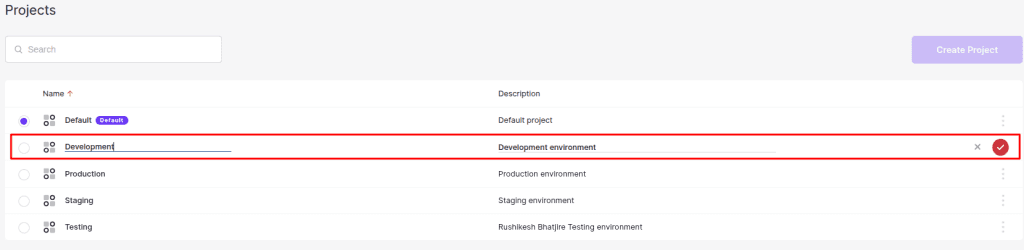
Step 4: Click the green checkmark ✓ to save, or X to cancel.
5. Setting a Default Project
The default project is automatically pre-selected when creating new VMs unless another project is selected manually. Only one project can be set as default at a time.
Step 1: On the Projects page, click the ⋮ menu next to the project you want to make default.
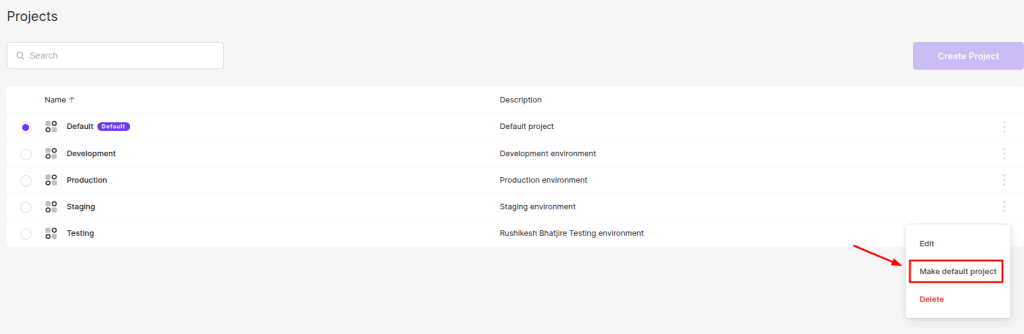
Step 2: Click Make default project.
Step 3: A confirmation popup appears — click Make to confirm.
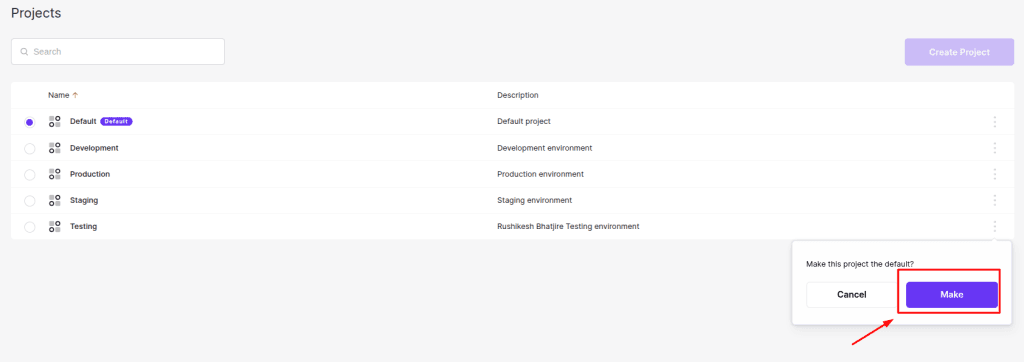
Step 4: A green notification confirms the change.
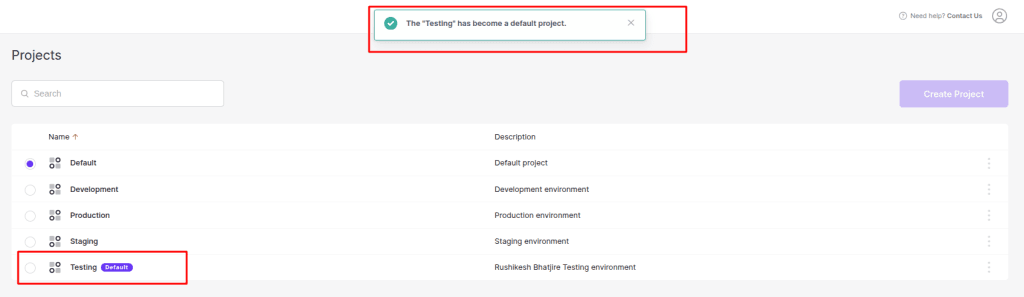
The Project dropdown will also update to show the new default with a Default badge.
ℹ️ Note: Setting a project as default means it will be automatically pre-selected when creating new VMs.
6. Deleting a Project
Step 1: On the Projects page, click the ⋮ menu next to the project you want to delete.
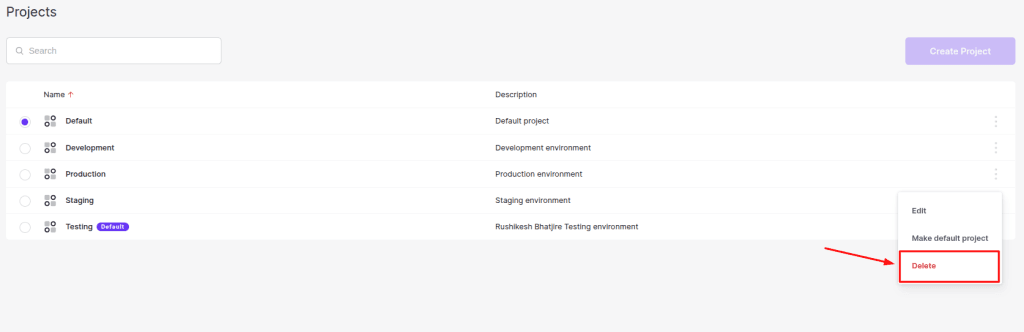
Step 2: Click Delete.
Step 3: A confirmation dialog appears — click Delete to confirm permanently.

Step 4: A green notification confirms the deletion.
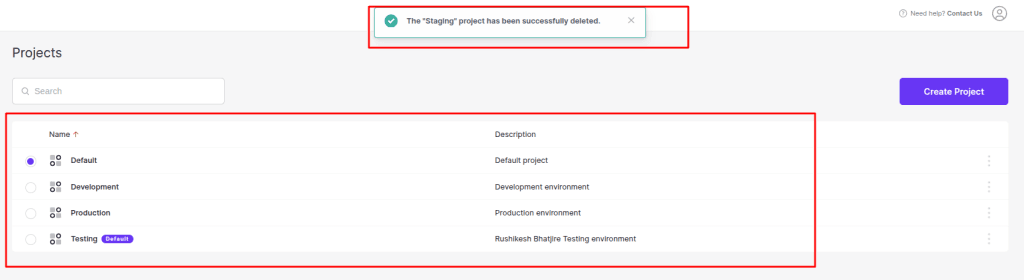
⚠️ Warning: Deleting a project permanently deletes all VMs and associated data within it. This action cannot be undone. Ensure all required resources are moved or removed before deleting the project.
Quick Reference
| Action | How to Access | Notes |
|---|---|---|
| Create Project | Project Dropdown → Create Project | Name is required |
| Switch Project | Project Dropdown → Select project | Takes effect immediately |
| View All Projects | Project Dropdown → Go to Projects | — |
| Edit Project | Projects Page → ⋮ → Edit | Inline editing |
| Set Default | Projects Page → ⋮ → Make default project | One default at a time |
| Delete Project | Projects Page → ⋮ → Delete | Permanent, cannot undo |
| Search Projects | Dropdown search bar or Projects page search bar | Filters by name |
Best Practices
Naming your projects Use short, environment-based names your whole team will recognize instantly. Examples: dev, staging, prod, testing. Avoid vague names like “Project 1” or “New Project.”
Choosing a Default project Set the environment your team works in most often as the default. For most teams, keeping Default or Development as the default is safest — it prevents accidental resource creation in Production.
Before deleting Always check that Virtual Machines, Volumes, and Networks inside the project have been removed or reassigned. Once deleted, the project and its configuration are gone permanently.
Team environments A good starting structure for most teams: one project each for Development, Staging, and Production. Use a separate Testing project for experiments that get cleaned up regularly.
Use Case: It is recommended to use separate projects for Development, Staging, and Production environments to keep workloads organized and reduce the risk of accidental changes.