CloudPe offers flexible and scalable infrastructure to meet the growing demands. At Cloudpe, you can quickly set up and manage virtual machines tailored to your specific needs. Whether you’re hosting applications, running development environments, or analysing data.
To create a Virtual Machine on CloudPe Dashboard, Click Here for more details.
To create a Virtual Machine on CloudPe Advanced Dashboard, follow the below steps:
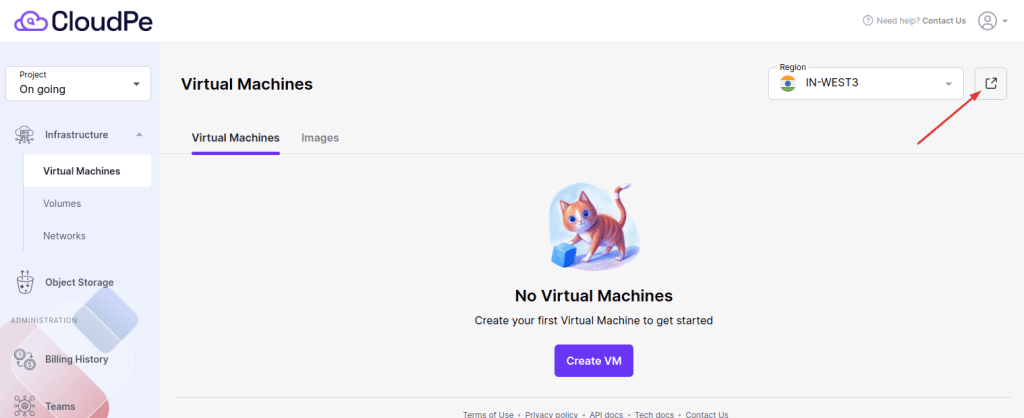
Step 1: Access the Dashboard
Click the arrow to navigate to the Region Advanced Dashboard, where you can create and manage virtual machines.
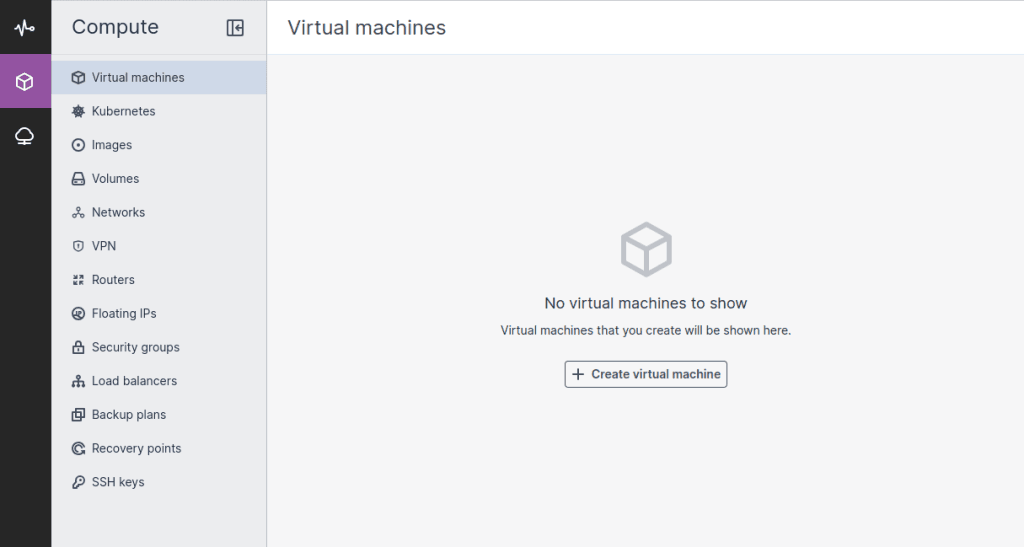
Step 2: Initiate Virtual Machine Creation
Click on “+ Create Virtual Machine” to start the deployment process.
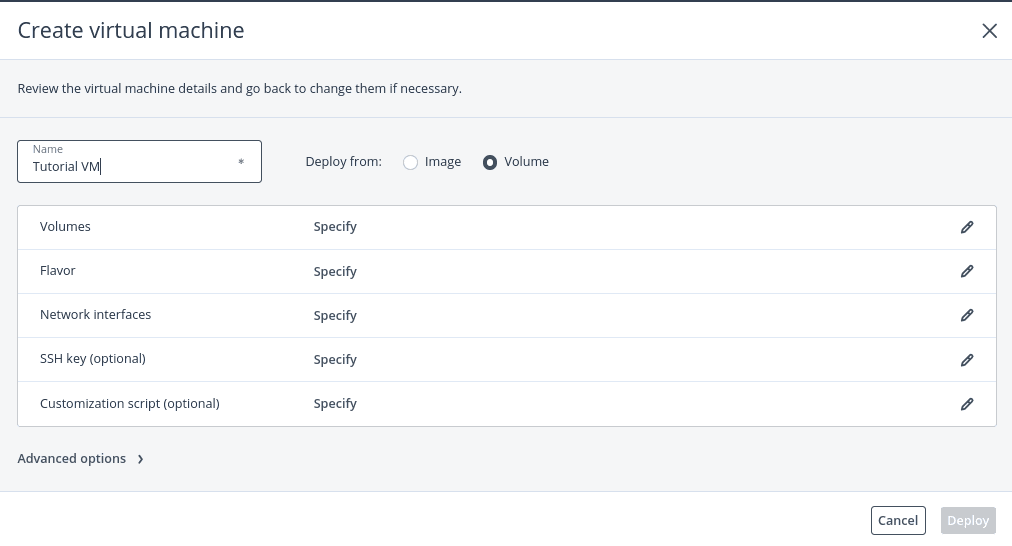
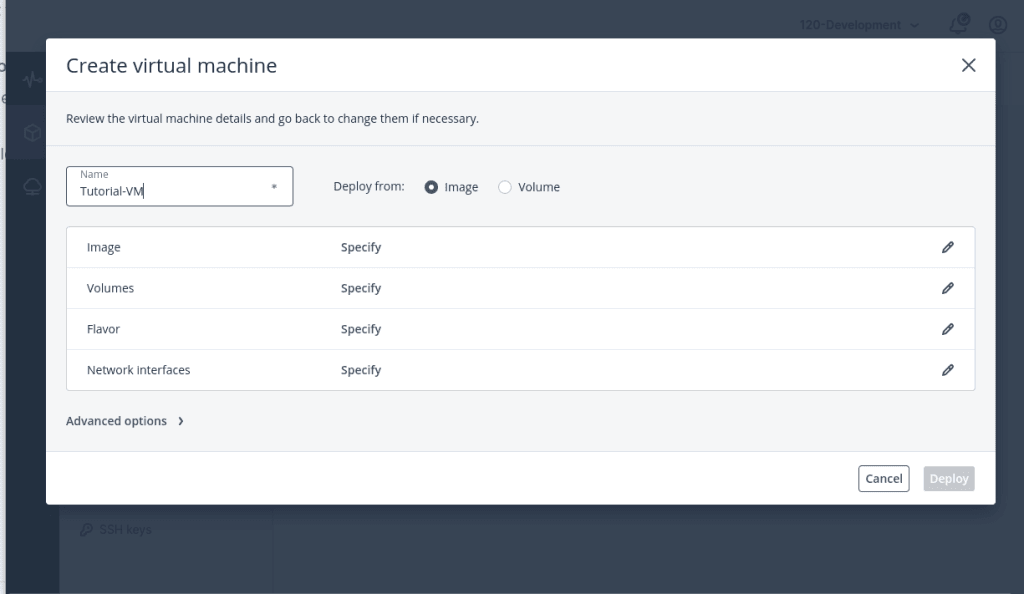
Step 3: Configure Virtual Machine Settings
- Assign a Name to Your Virtual Machine:
Enter a unique name for your virtual machine. Modify configurations such as Image, Volumes, Flavor, and Network Interface using the edit (pencil) icon.
1. Deploy from Volume:
Deploying a VM Using a Volume, This method uses an existing volume (disk) that already has an OS, applications, or data. It is helpful in the below cases.
a) Recovering a VM from a previously used volume.
b) Migrating a VM to a new instance without reinstalling the OS.
c) Preserving data and system configurations.
Click the pencil icon and select attach boot Volume, and you can select the desired volume.
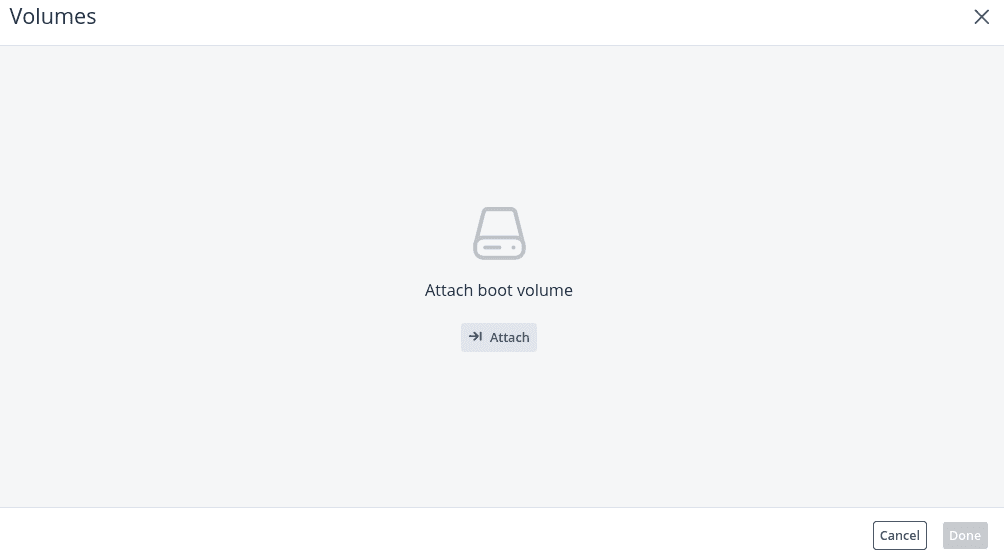
Click “Attach“
2. Deploy from Images:
Deploying a VM Using an Image, This method creates a new VM from a predefined OS image, similar to installing an OS from scratch. It helps set up a new VM with a fresh OS installation.
List of CloudPe Supported Guest Operating System, Click Here for more details.
2. Select the Base OS Image
Choose a base OS image from the available list or select a custom image if required.
Click “Done” after selection. select one from the added Custom Images. Click Done.
Note: Customers who wish to use their own ISO image can provide it to us, and we will add it from our end.
To know more about Adding Images, Click Here for more details.

3. Define Compute Resources (Flavor Selection)
Choose a Flavor that specifies the VM’s CPU, RAM, and other resource allocations.
Ensure the selected flavor meets the hardware requirements of the chosen operating system.
Click “Done” to proceed.
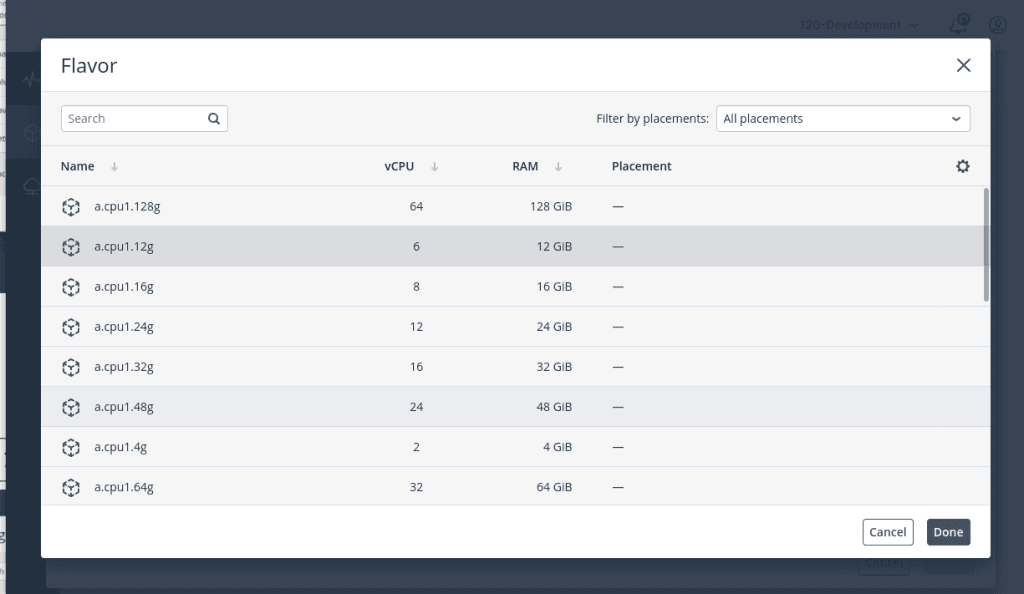
When selecting a flavor, make sure it meets the hardware requirements of the guest operating system you selected earlier. For example, some operating systems may require more CPU or memory to function optimally.
4. Configure Network Interfaces
In the Add Network Interface window, choose the compute network you want to connect the virtual machine to.
By default, the primary Public IP address will be assigned automatically. If you want to assign them manually, uncheck the Assign automatically boxes and enter your desired public IPv4 address.
Click to Add.
Select public IP by using the dropdown arrow.
Note: It is recommended to assign a Public IP during the initial setup to minimize potential connectivity issues and ensure seamless access.
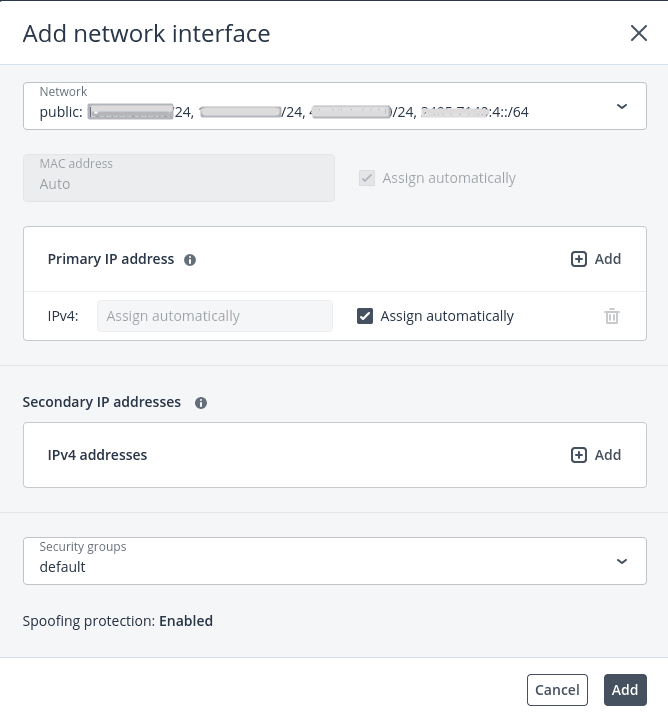
Optionally, you can also add secondary IP addresses in the Secondary IP addresses section. Unlike the primary IP, secondary IP addresses are not automatically configured in the guest OS. You will need to assign them manually within the virtual machine.
If you need a Private IP for your virtual machine, you must set up a Virtual Private Network.
To create a Virtual Private Network, Click Here for more details.
If you’ve selected a network with IP address management enabled, spoofing protection is turned on by default, and the default security group is selected. This security group allows all traffic to and from the VM.
Click Done.
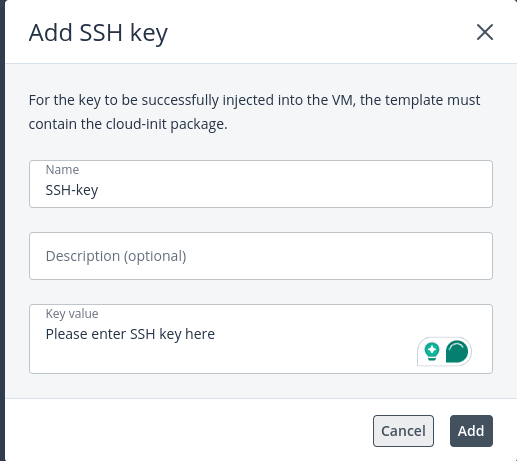
5. Add Public SSH key
You can click “Add SSH key” to add the public key that you generated on your server from where you wish to access the virtual machine.
To know more about SSH Key for authentication, Click Here for more details.
Step 4: Advanced Customization (Optional)
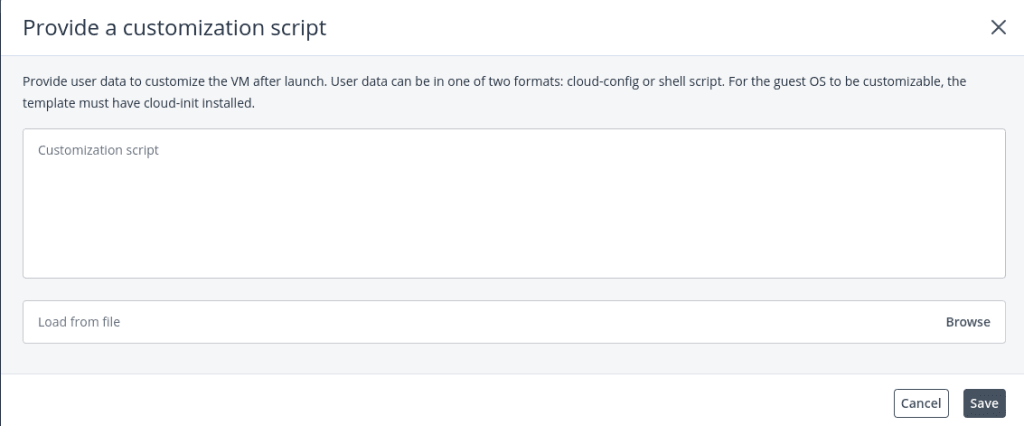
1. Customization Script (User Data)
Provide user data to customize the VM after launch. User data can be in a YAML-based configuration file or a shell script that runs commands on the VM upon launch.
2. Enable CPU and RAM Hot Plug Option
The CPU and RAM Hot Plug feature allows you to dynamically allocate or adjust CPU and RAM resources on a virtual machine (VM) without requiring a reboot. This is particularly useful for scaling workloads on-demand without downtime.
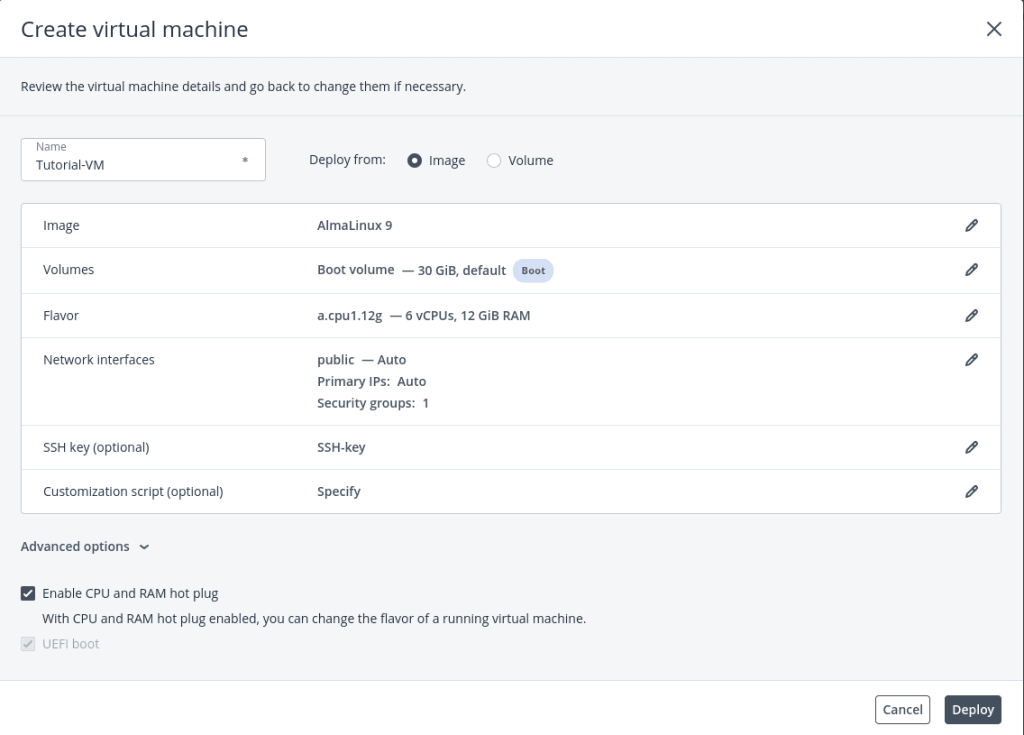
Step 5: Deploy the Virtual Machine
Click “Deploy” to launch the virtual machine.
Your Virtual machine has been created successfully.
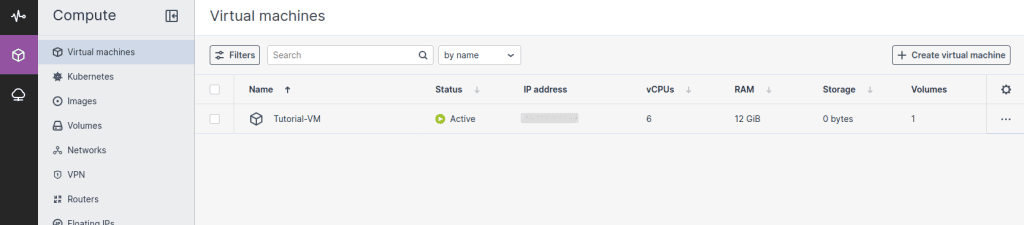
You can manage the created Virtual machine by clicking on the Virtual machine’s name.
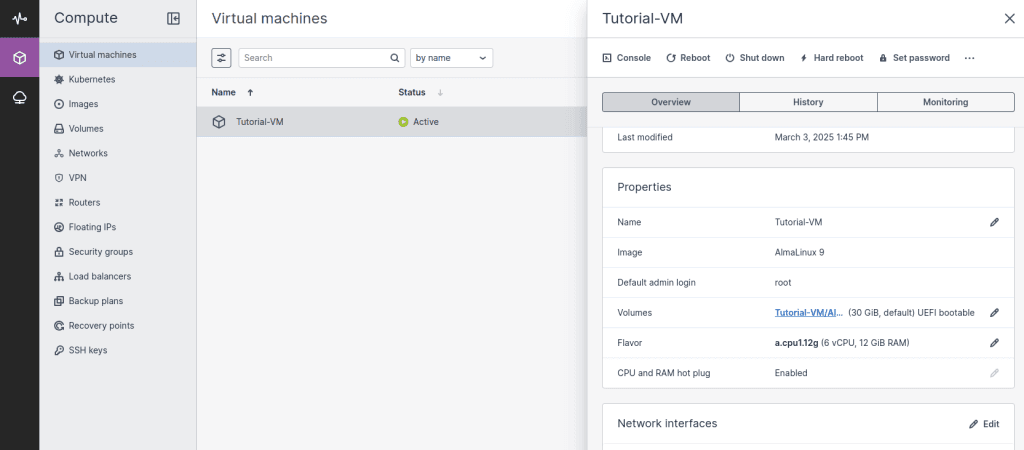
Step 6: Assign a Password to your Virtual Machine:
Enter a strong password for your virtual machine. This password will be required to log in to the VM once it is deployed.
To set a password for a newly created virtual machine, Click Here for more details.