Purpose: It covers the process of bringing new disks online and initializing them.
Online and offline status
Disk Management displays whether a disk is online (available) or offline.
In Windows, by default, all newly discovered disks are brought online with read and write access.
You can check disk visibility / Availability by following the steps below.
- Open the Computer Management console by searching for it in the taskbar.
- Navigate to Storage > Disk Management to view disk status.
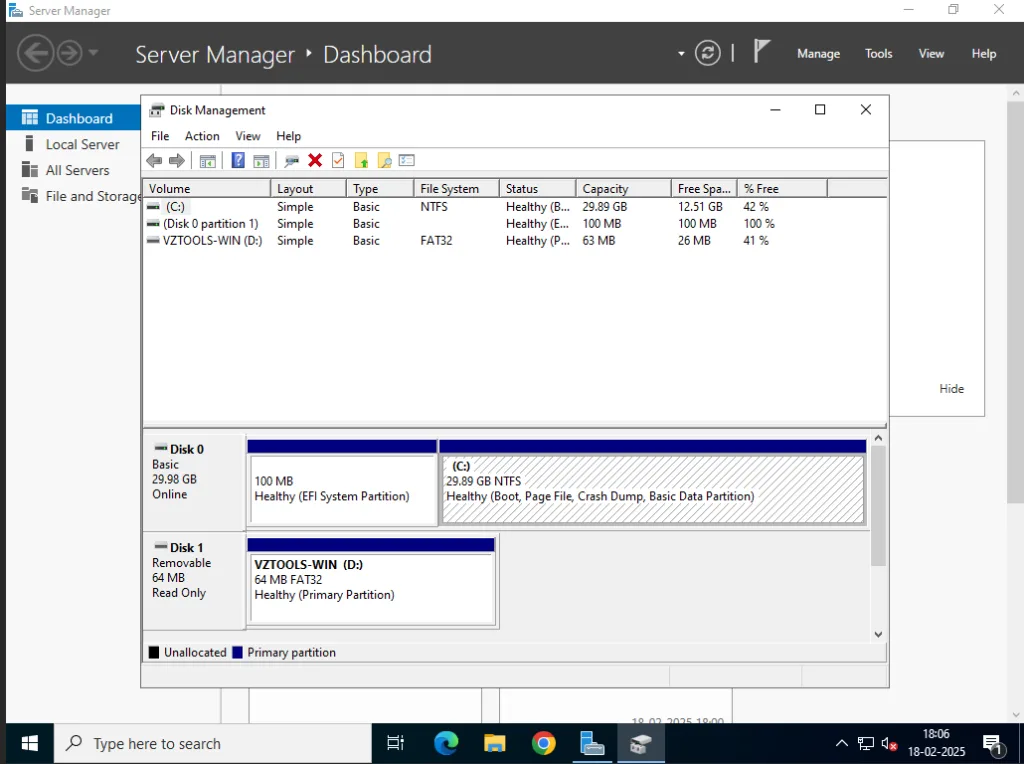
Newly Attached Disk:
Newly added disks may not be brought online automatically by Windows.
In such cases, the disk will be displayed as Offline with a message stating, “The disk is offline because of a policy set by an administrator.”
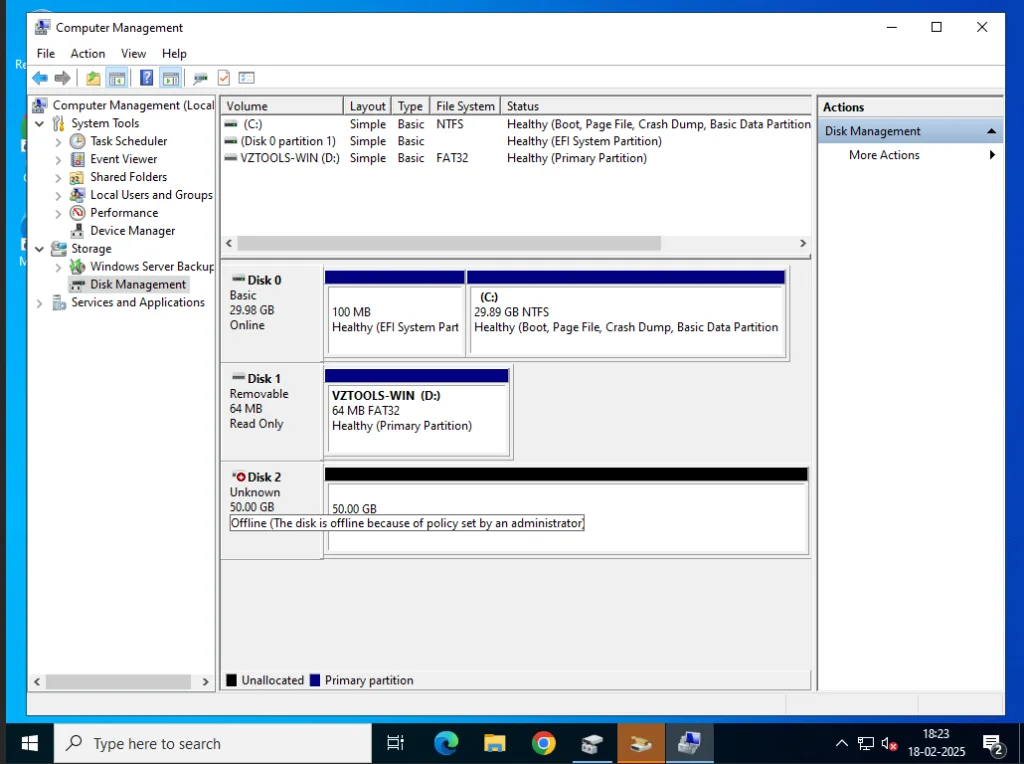
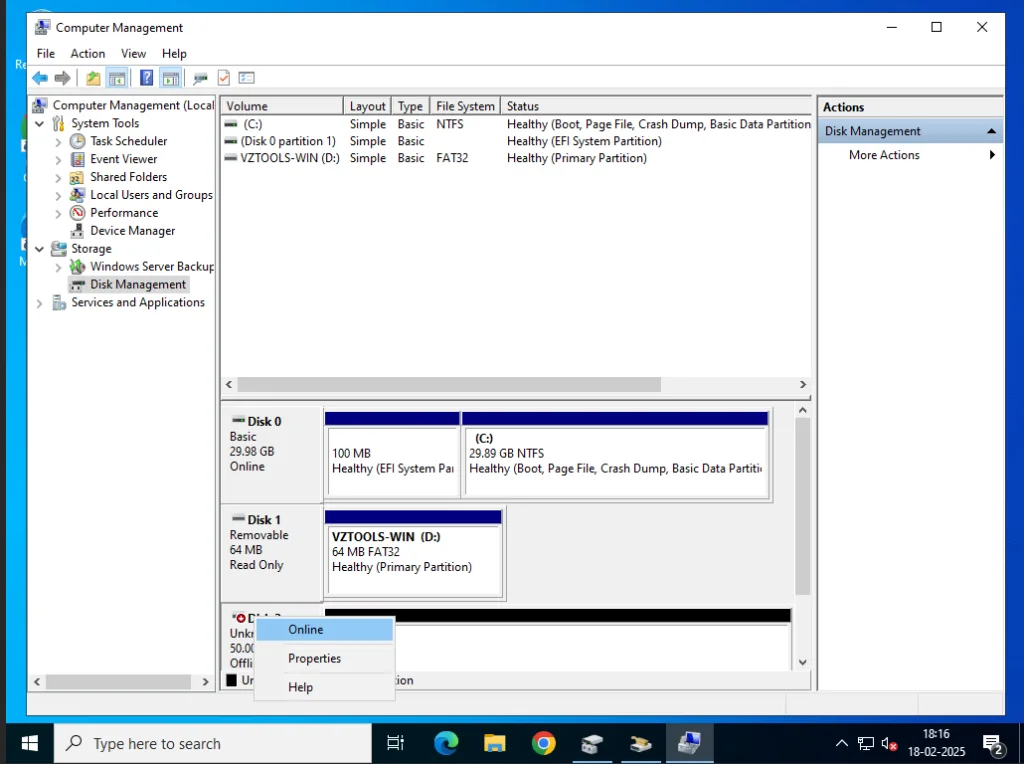
If a disk is offline, you must bring it online before you can initialize it or create volumes on it.
- Right-click on the disk name (e.g., Disk 2).
- Select Online to enable the disk for further configuration.
Now, disk 2 is showing Not initialized and unallocated.
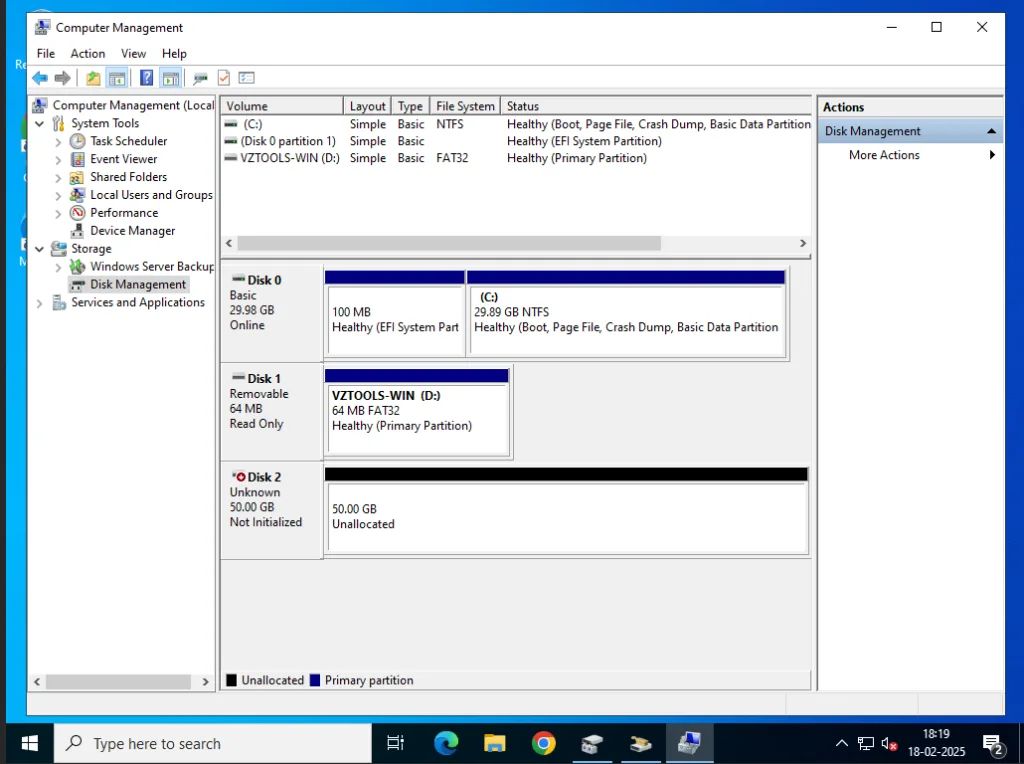
Initialize a new disk
- In Disk Management, select and hold (or right-click) the disk you want to initialize, and then select Initialize Disk. If the disk is listed as Offline, first select and hold (or right-click) the disk, and then select Online.
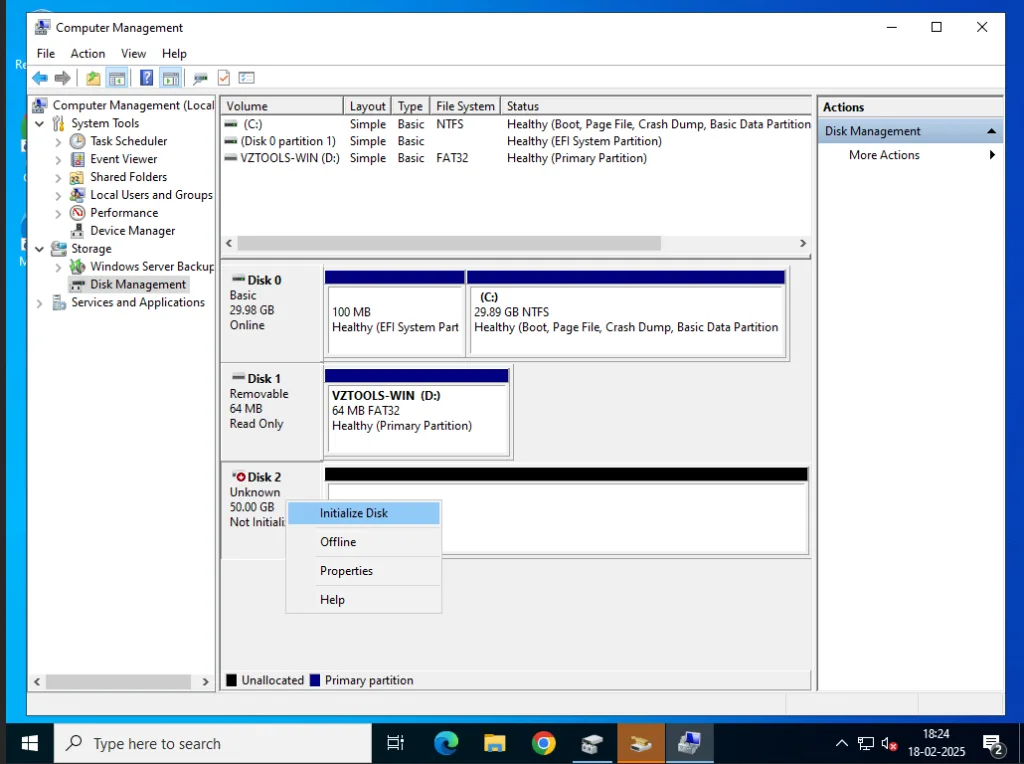
2. In the Initialize Disk dialog box, ensure the correct disk is selected, choose the GPT partition style, as default partition, and click OK to confirm and proceed.
GPT (GUID Partition Table) is a modern partitioning scheme used on disks, replacing the older MBR (Master Boot Record). It is part of the UEFI (Unified Extensible Firmware Interface) standard and offers several advantages over MBR.

The disk status briefly changes to Initializing and then to the Online status
Creating a New Volume
- Right-click the unallocated space on the disk and select New Simple Volume.
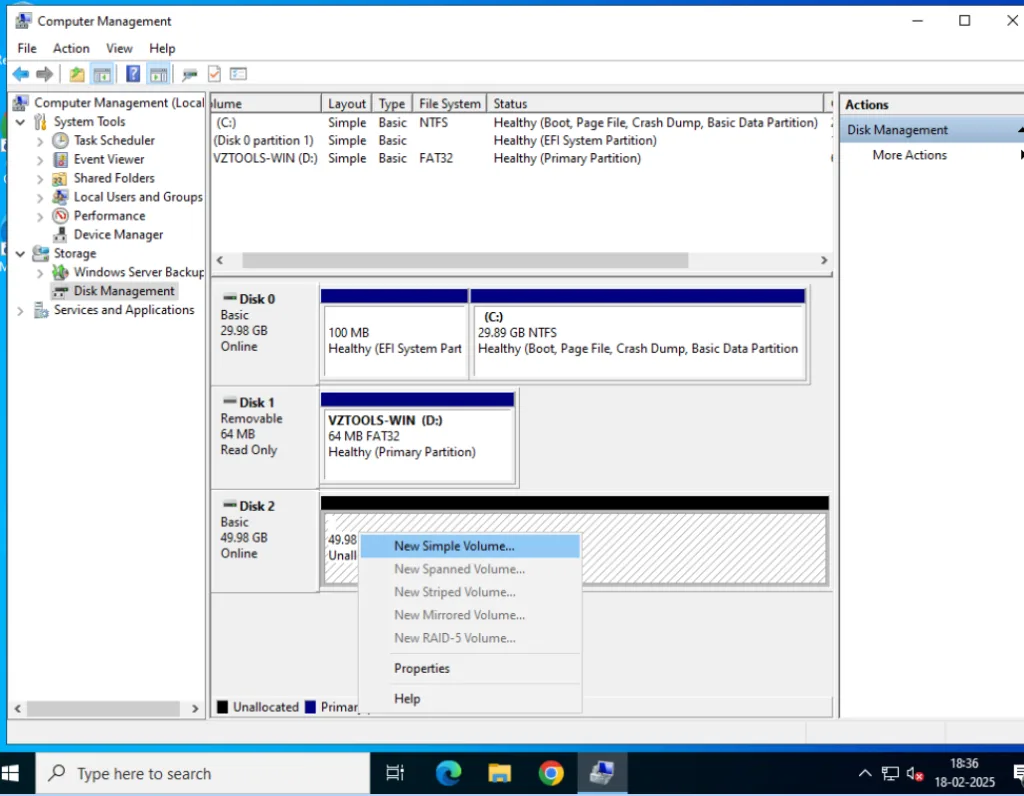
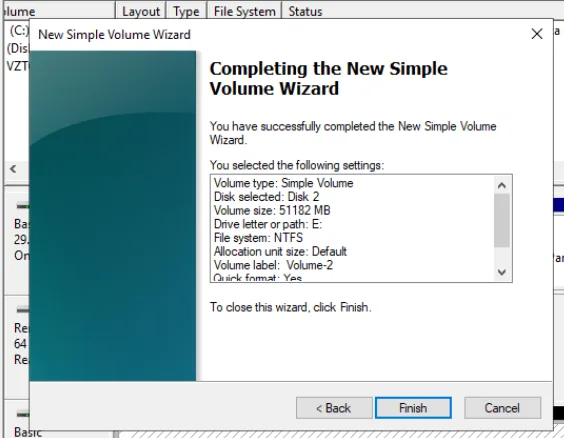
2. Follow the on-screen wizard:

Select Next. Specify the size of the volume, and then select Next again.
For the volume size, the common approach is to accept the default size, which uses the whole drive.

Specify the drive letter you want to assign to the volume, and then select Next.

Specify the file system you want to use (usually NTFS) and assign a volume label.
select Next,

For completion click to Finish.
Once completed, the disk will be displayed as Healthy (Online) in Disk Management.
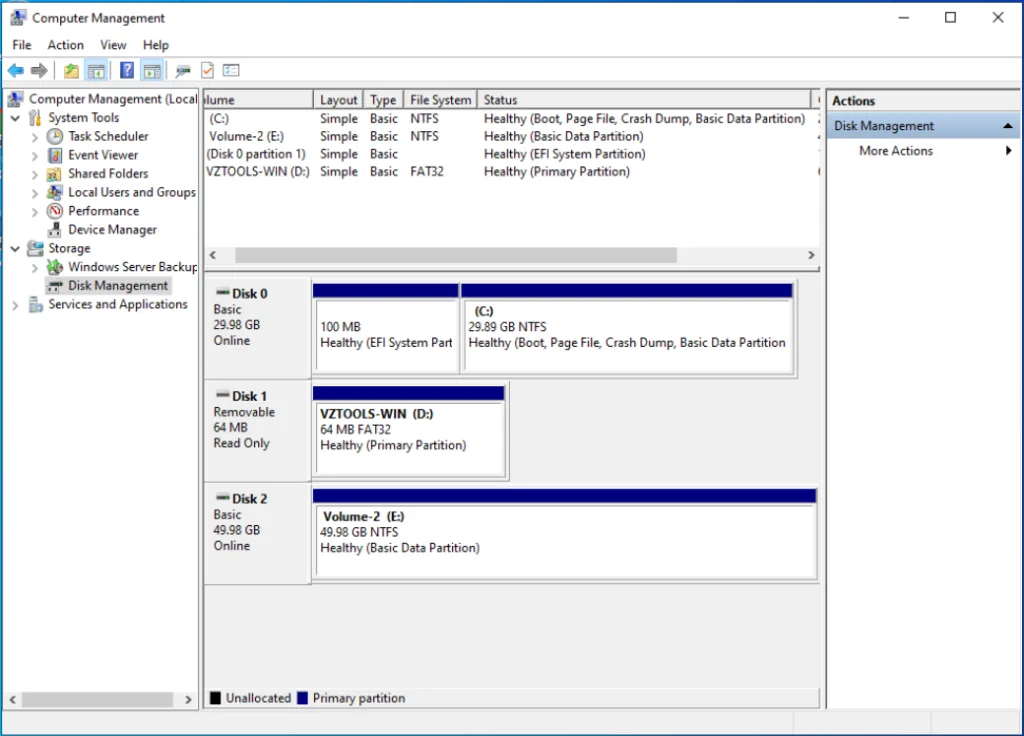
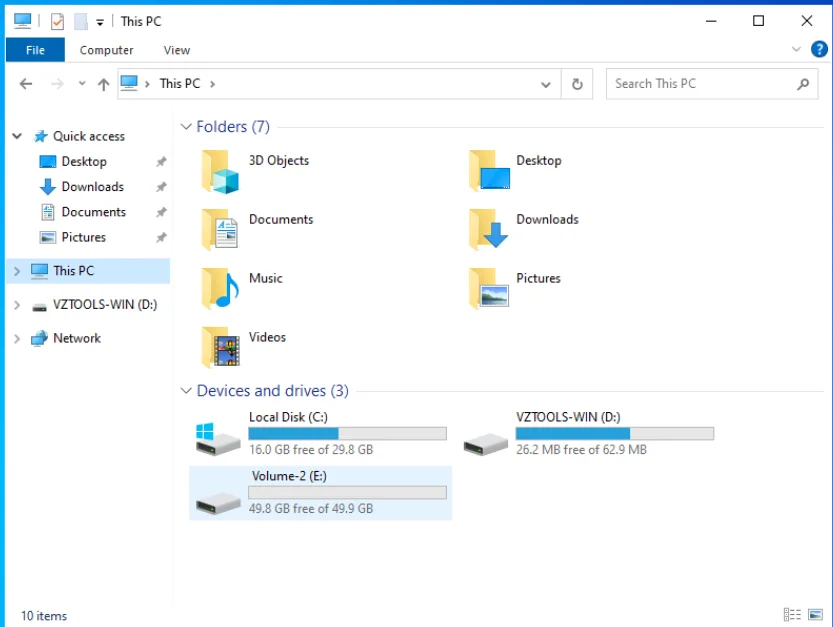
The new volume (e.g., Volume 2 [E:]) will be visible in File Explorer (This PC).
How to Extend a Basic Volume on a Windows VM
Next Step: Once the disk is online and initialized, you can extend an existing volume using the new space.
See How to Extend a Basic Volume on a Windows VM for detailed steps.