A security group is a set of rules that control the network traffic allowed to reach your virtual machines (VMs). These rules decide:
- What kind of traffic can come into the VM (incoming).
- What kind of traffic can go out from the VM (outgoing).
Each project has a default security group that is created automatically. This default group allows all types of traffic on all ports and cannot be deleted.
You can Create custom security groups with specific rules. Assign one or more security groups to new or existing VMs. When you update the rules in a security group (add or remove), the changes take effect immediately.
Note: Security group rules work only for IPv4 traffic. IPv6 is not supported.
How to Create Security Groups?
To create a security group:
1. Login to your CloudPe Dashboard, go to Networks and select Security Groups.
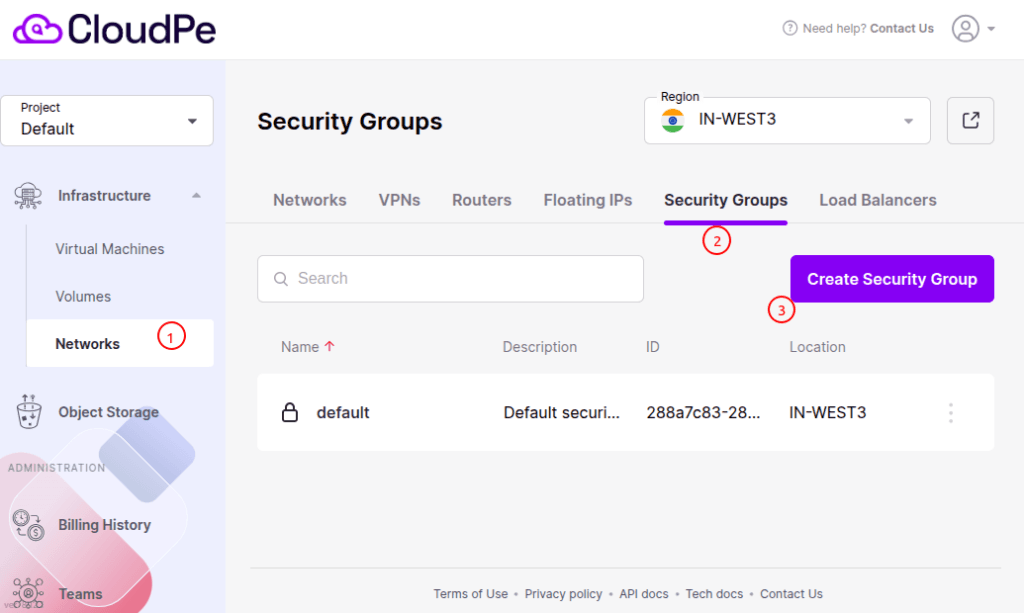
Here you can see a default Security Group where all types of traffic on all ports are allowed.
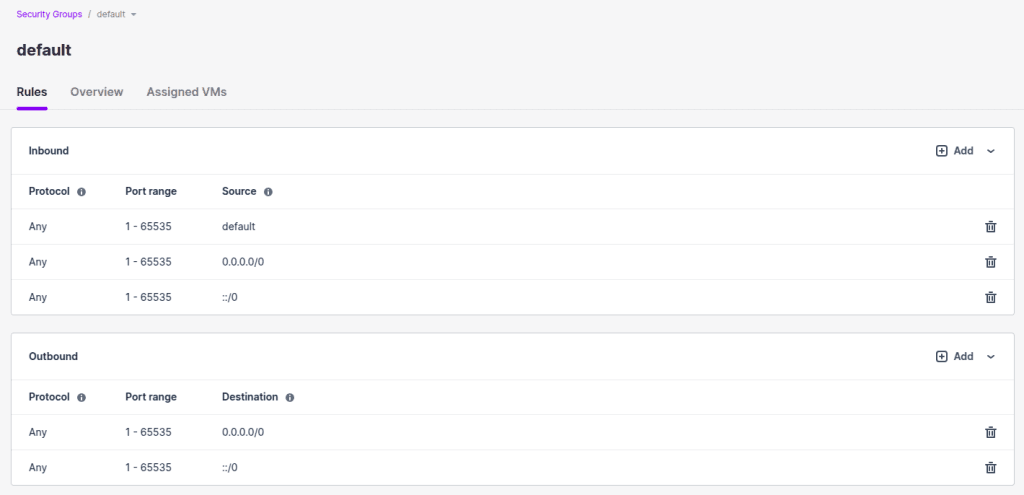
Therefore, you can either use the default security group rules or add specific rules from your end if you want to use it for your virtual machines.
You can attach this default Security Group while creating new virtual machines (VMs) or modify the Security Group for already-existing VMs from this place.
2. You can add new Security Group by clicking on “Create Security Group” button.
In the Add security group window, specify a name and description for the group, and then click Add.
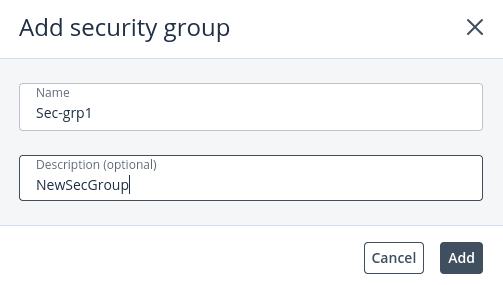
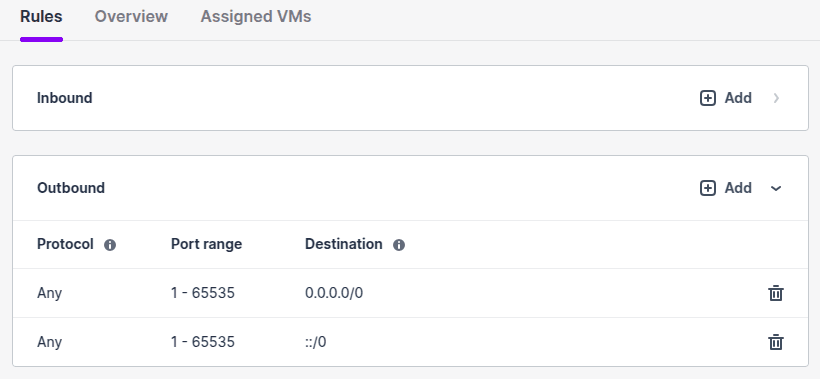
By default, the new security group will deny all incoming traffic and allow only outgoing traffic to assigned virtual machines.
Managing security group rules
You can change security groups by adding new rules or removing existing ones. However, you cannot edit a rule directly. To make changes to an existing rule, you need to delete it and then create a new rule with the updated settings.
To add a rule to a security group
1. On the Security groups screen, click the security group to add a rule to.
2. On the group right pane, click Add in the Inbound or Outbound section to create a rule for incoming or outgoing traffic.
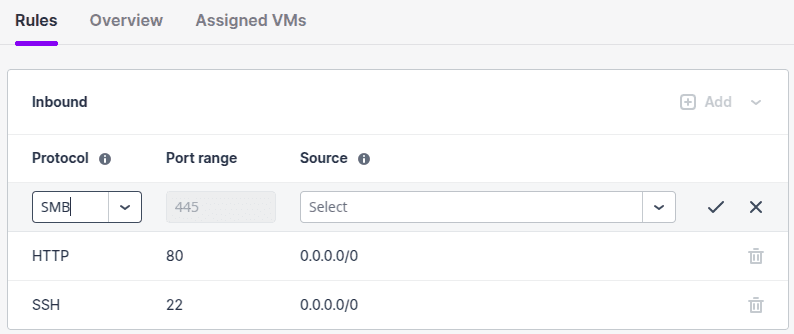
3. Click the check mark to save the changes.
Specifying IP Addresses in Security Group Rules
When adding an Inbound or Outbound rule to a security group, you can control access more precisely by specifying:
1. Single IP Address:
To allow traffic only from one IP address, use the IP followed by /32, which represents a single host in CIDR notation.
Example:
xx.xx.xx.xx/32
This allows traffic only from the mentioned IP.
2. IP Range (IP Pool)
To allow traffic from a range of IP addresses, use CIDR (Classless Inter-Domain Routing) notation. The subnet mask determines how many IPs are included.
Example:
xx.xx.xx.xx/24
This allows traffic from xx.xx.xx.0 to xx.xx.xx.255 — a total of 256 IP addresses.
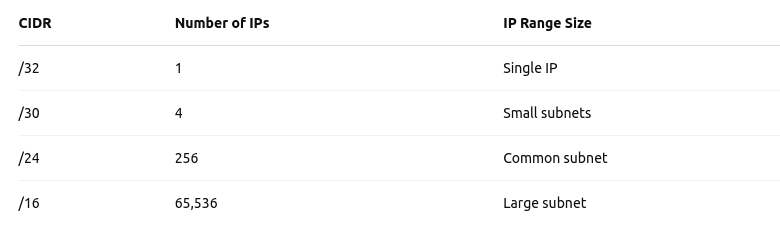
3. Calculating CIDR Blocks
CIDR blocks define how many bits are fixed in the IP and how many are variable.
Here’s a quick reference:
You can use online CIDR calculators such as:
These tools provide detailed information such as:
- Netmask – Subnet mask
- CIDR Base IP – The network address
- Broadcast IP – The final IP in the range, used for broadcasting
- Total IP Count – Total number of IPs in the range
- First Usable IP – The first usable host IP in the range
- Last Usable IP – The last usable host IP before the broadcast IP
This helps in making precise security group rules that match your networking needs.
Note: You can perform all these above actions from Advance Dashboard too.
Changing security group assignment for existing VM.
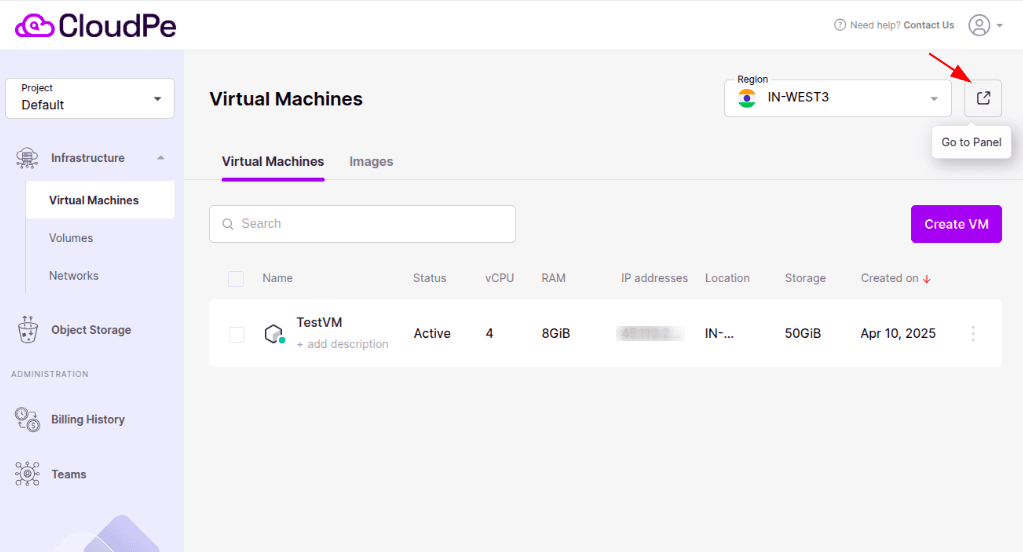
When you create a VM, you select security groups for the VM network interfaces. You can also change assigned security groups later using Advance Dashboard.
Note: To update the security group of a Existing VM, use Advance Dashboard only. CMP Dashboard don’t have this feature.
You can click on Go to Panel button at top right corner to go to Advance Dashboard.
Viewing Virtual Machines in a Security Group
- Go to the Security Groups screen and select the security group you want.
- On the right side, open the Assigned VMs tab to see all virtual machines in the group, along with their current status.
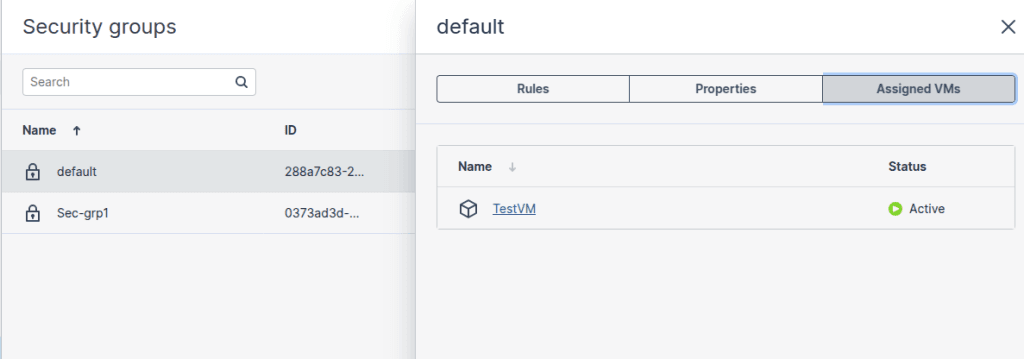
Click on a VM name to open its Overview page, where you can change the security group for its network interfaces.
Assigning a Security Group to a Virtual Machine
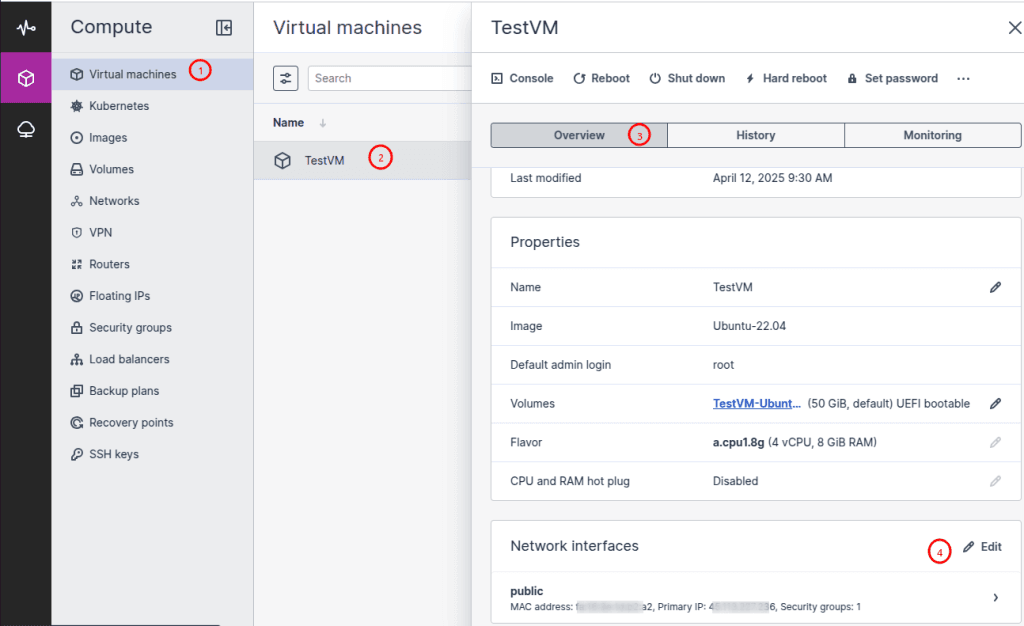
1. Open the Virtual Machines screen and choose the VM you want to update.
2. In the Overview tab, click the pencil icon in the Networks section.
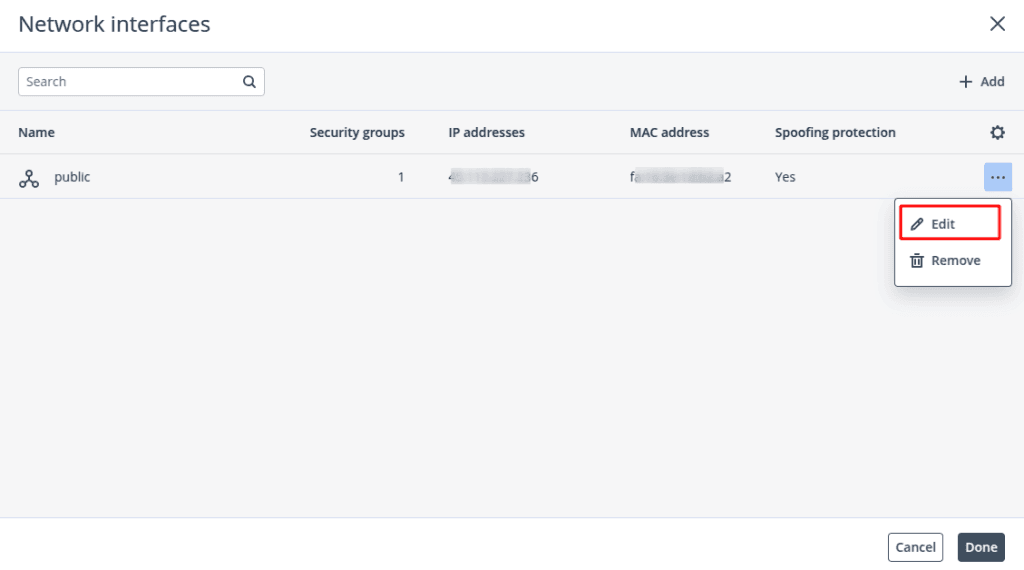
3. Next to the network interface you want to update, click the three dots (ellipsis icon) and select Edit.
4. In the Edit Network Interface window, go to the Security Groups tab.
5. Select one or more security groups from the drop-down menu and click Save.
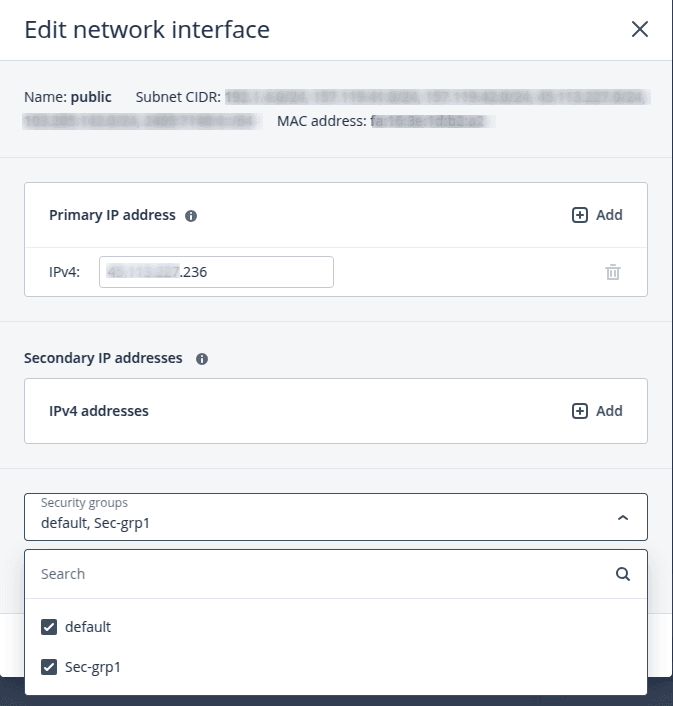
The new security group rules will take effect immediately.
How to Delete a Security Group?
To Delete a Security Group:
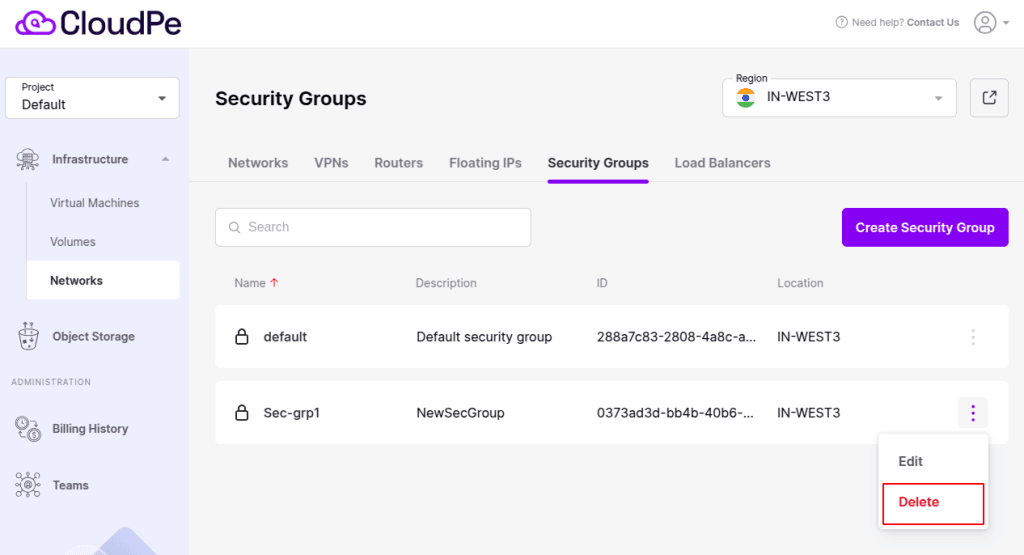
1. On the Security groups screen, click the required security group.
2. On the group right pane, click Delete.
3. Click Delete in the confirmation window.
Note: You cannot delete a security group if it is assigned to a VM.
To remove a rule from a security group
If you want to remove just a Rule from the Security Group then,
1. On the Security groups screen, click the required security group.
2. On the group right panel, click the bin icon next to a rule you want to remove.
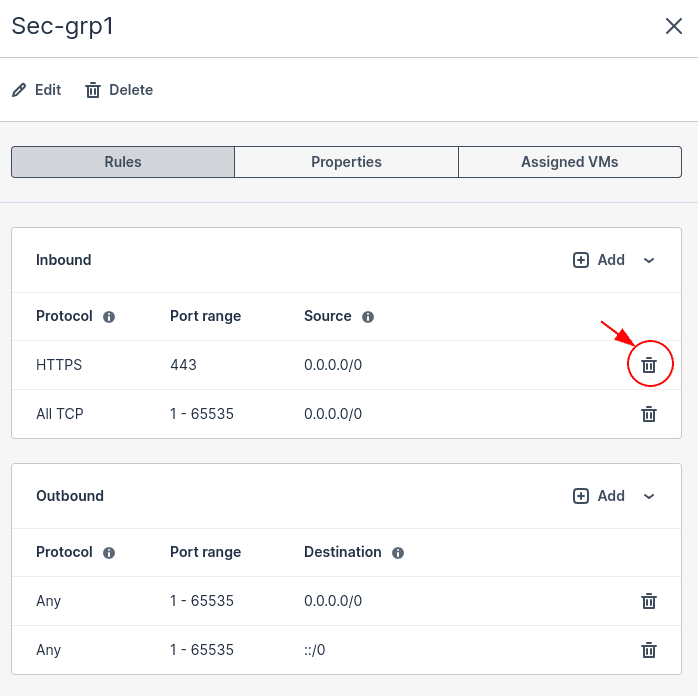
As soon as the rule is removed, this change is applied to all of the virtual machines assigned to the security group.