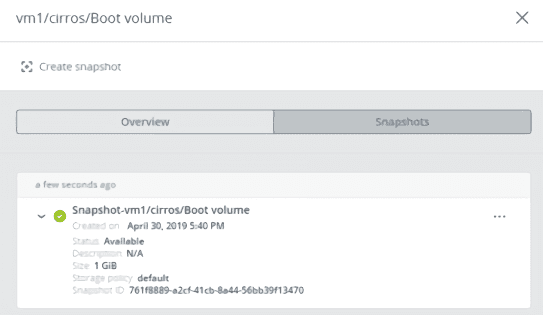
A volume in Cloudpe is a virtual disk drive that can be attached to a virtual machine. The integrity of data in volumes is protected by the redundancy mode specified in the storage policy.
Creating and Deleting Volumes
Limitations:
- A volume is removed along with all of its snapshots.
Creating Volume:
- On the Volumes screen, click Create volume.
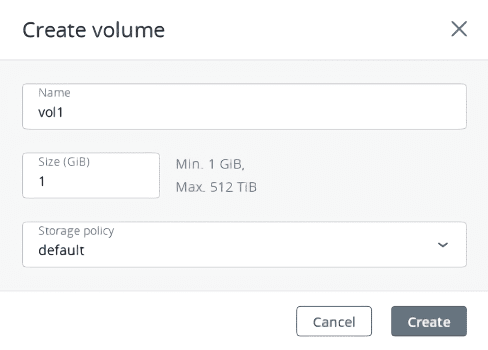
- In the Create volume window, specify a volume name and size in gigabytes, select a storage policy, and then click Create.
Removing Volume:
- On the Volumes tab, check the status of the volume you want to remove.
- If the status is “In use”, click the volume, and then click Force detach.
- If the status is “Available”, click the volume, and then click Delete
Attaching and Detaching Volumes
Limitations:
- You can only attach and detach non-boot volumes.
Requirements:
- A volume is created, as described in Creating and Deleting Volumes.
- To be able to use volumes attached to VMs, they must be initialized inside the guest OS by standard means.
Attaching Volume to Virtual Machine
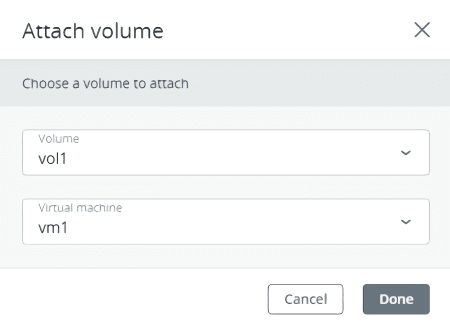
- On the Volumes screen, click an unused volume.
- On the volume right pane, click Attach.
- In the Attach volume window, select the VM from the drop-down list, and then click Done.
Detaching Volume from Virtual Machine:
- On the Volumes screen, click a volume that is in use.
- If the VM is stopped, click Detach on the volume right pane.
- If the VM is running, click Force detach on the volume right pane.
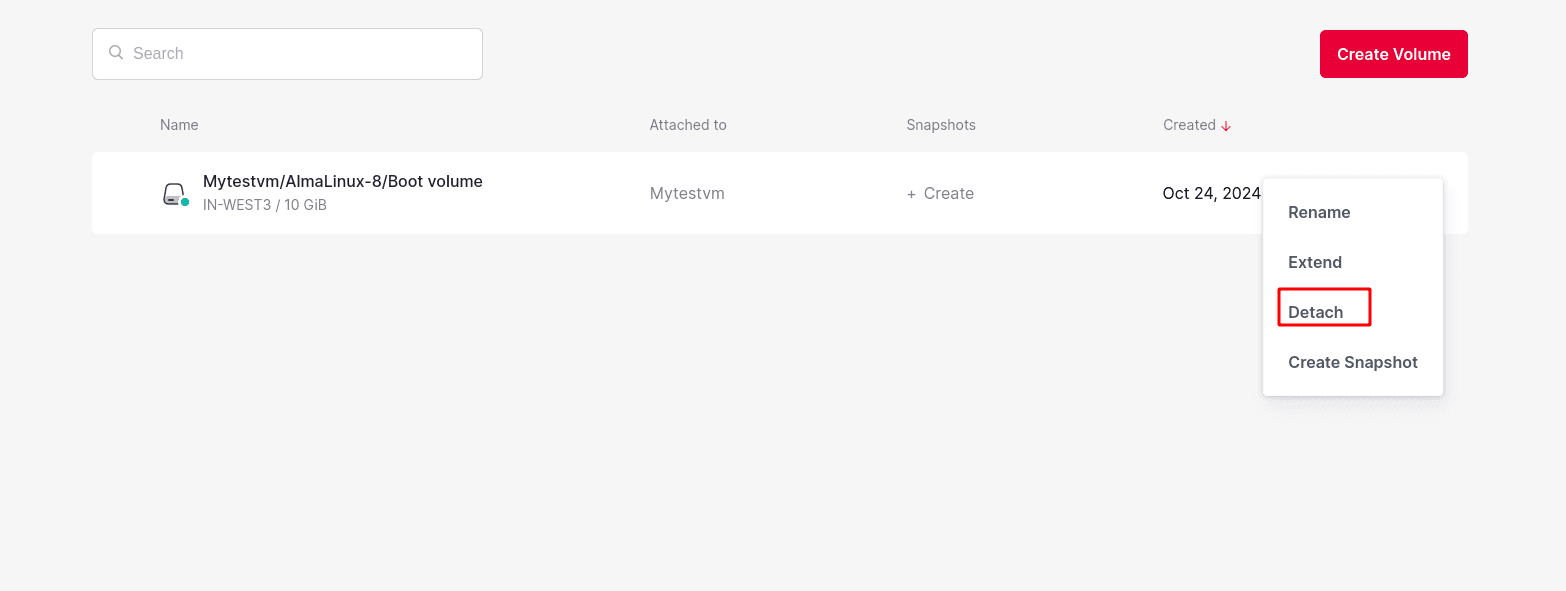
Note: There is a risk of data loss.
Resizing Volumes
You can change the volume size only by increasing it. Volumes can be extended for both running (online resizing) and stopped (offline resizing) virtual machines. Online volume resizing allows users to avoid downtime and enables scaling VM storage capacity on the fly without service interruption.
Limitations:
- You cannot shrink volumes.
- During volume resizing, the file system inside the guest OS is not extended.
- If you revert a volume to a snapshot that was taken before the volume extension, the new volume size will be retained.
Prerequisites:
- A volume is created, as described in Creating and Deleting Volumes.
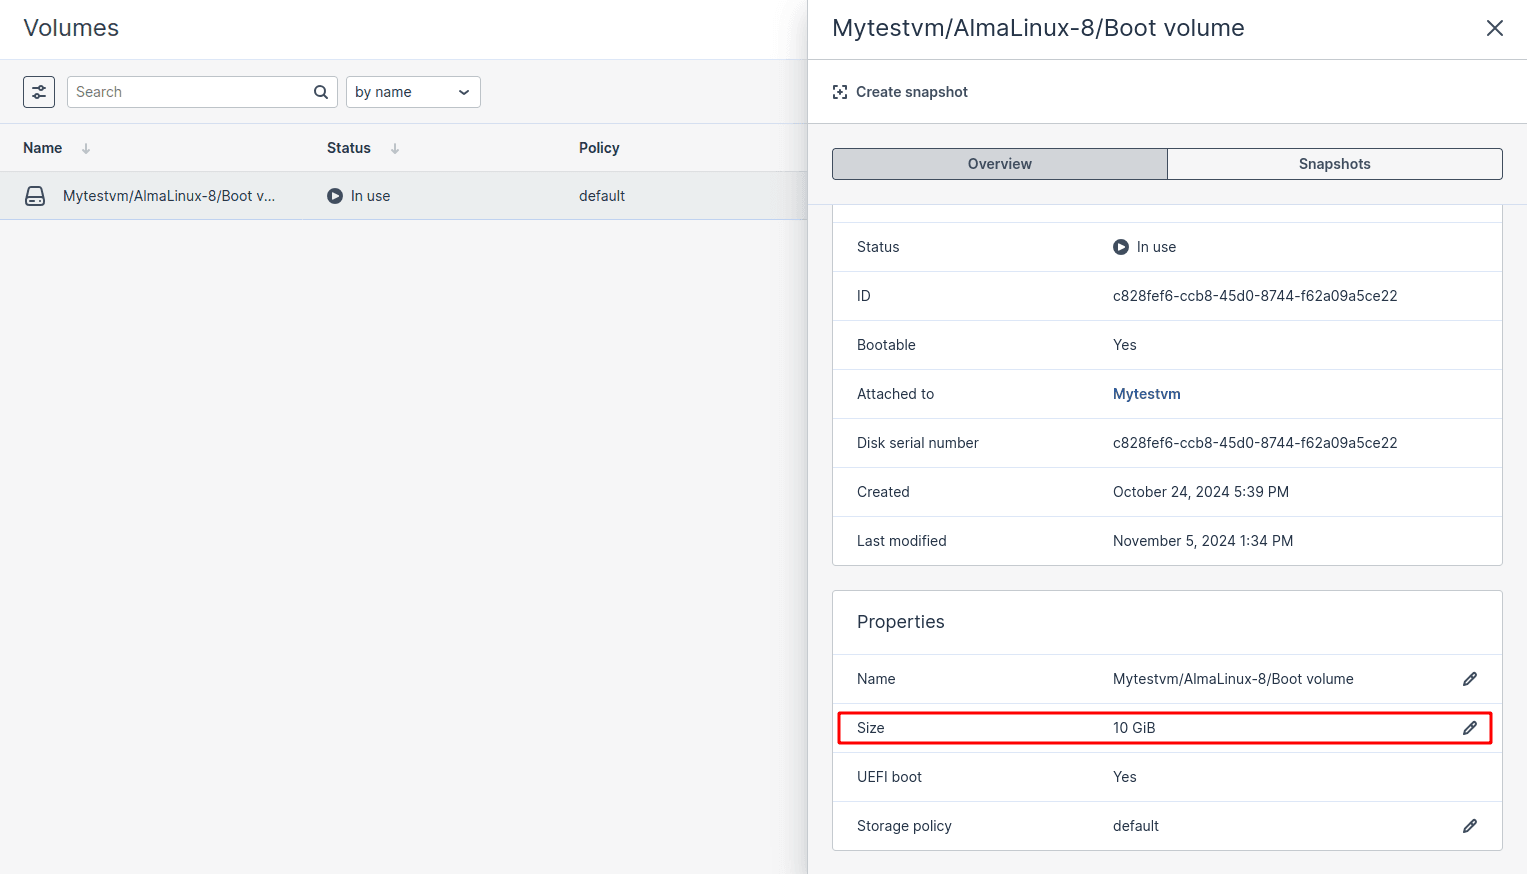
Extending Volume
- On the Volumes screen, click a volume.
- Click the pencil icon in the Size field.
- Enter the desired volume capacity, and then click the tick icon.
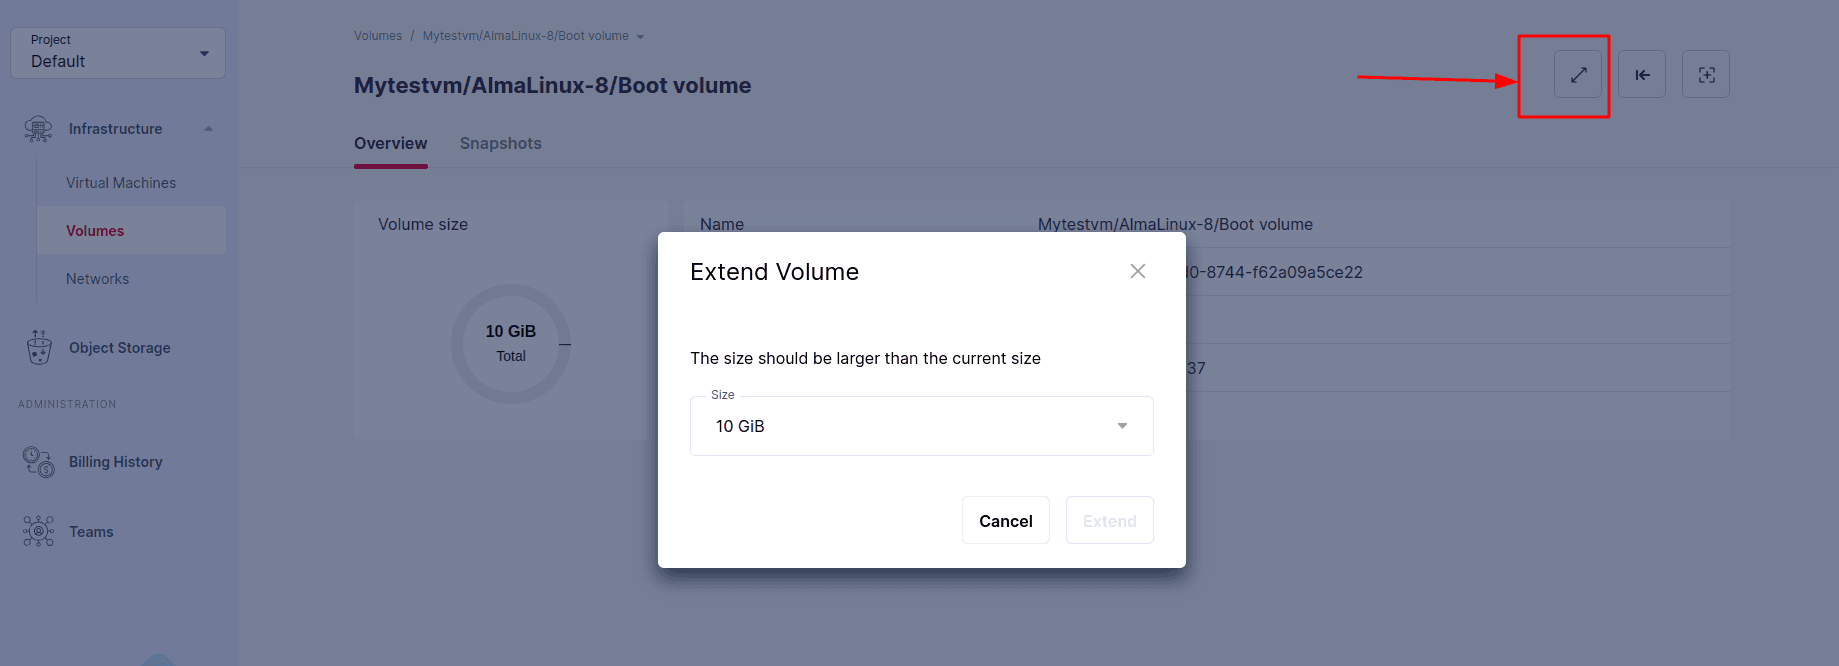
After the volume is extended, you will need to re-partition the disk inside the guest OS to allocate the added disk space.
Changing the Storage Policy for Volumes
You can manage to compute volume redundancy and performance by changing the storage policy applied to the volume. The storage policy can be changed for volumes attached to both running and stopped virtual machines.
Limitations:
- Only storage policies enabled by project quotas will be available for selection.
Prerequisites:
- A volume is created, as described in Creating and Deleting Volumes.
Changing the Storage Policy for Volumes
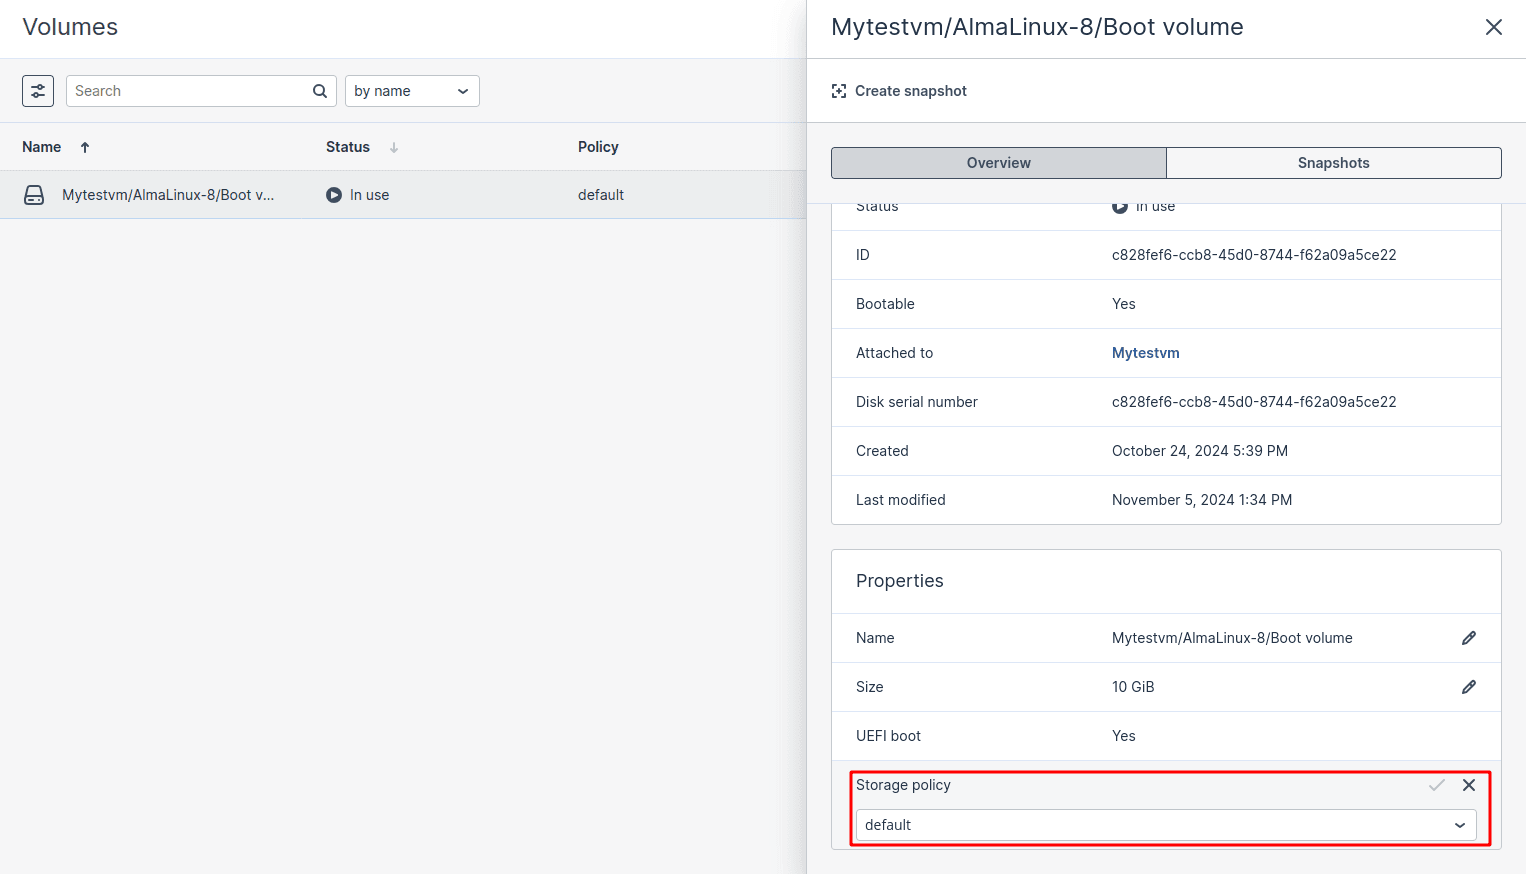
- On the Volumes screen, click a volume.
- Click the pencil icon in the Storage policy field.
- Select a new storage policy, and then click the tick icon. You can choose only between storage policies with the same redundancy type.
Creating Images from Volumes
To create multiple VMs with the same boot volume, you can create a template from an existing boot volume and deploy VMs from it.
Creating Template from Boot Volume
- Power off the VM that the original volume is attached to.
- Switch to the Volumes screen, click the volume’s ellipsis button, and select Create image.
- In the Create image window, enter an image name and then click Create.
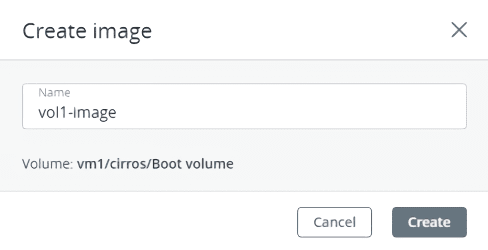
The new image will appear on the Images screen.
Cloning Volumes
Limitations:
- You can clone volumes that are not attached to VMs or attached to stopped VMs.
Prerequisites:
- A volume is created, as described in Creating and Deleting Volumes.
Cloning Volume:
- On the Volumes screen, click a volume.
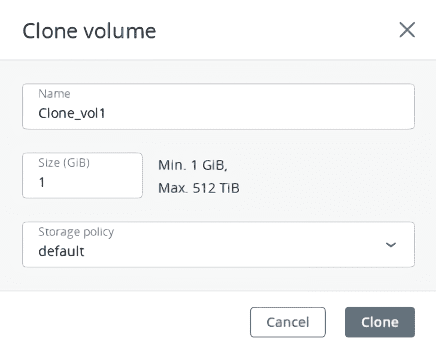
- On the volume right pane, click Clone.
- In the Clone volume window, specify a volume name, size, and storage policy. Click Clone.
Managing Volume Snapshots
You can save the current state of a VM file system or user data by creating a snapshot of a volume. A snapshot of a boot volume may be useful, for example, before updating VM software. If anything goes wrong, you will be able to revert the VM to a working state at any time. A snapshot of a data volume can be used for backing up user data and testing purposes.
Prerequisites:
- To create a consistent snapshot of a running VM’s volume, the guest tools must be installed in the VM. The QEMU guest agent included in the guest tools image automatically quiesces the filesystem during snapshotting.
Creating Snapshot of Volume:
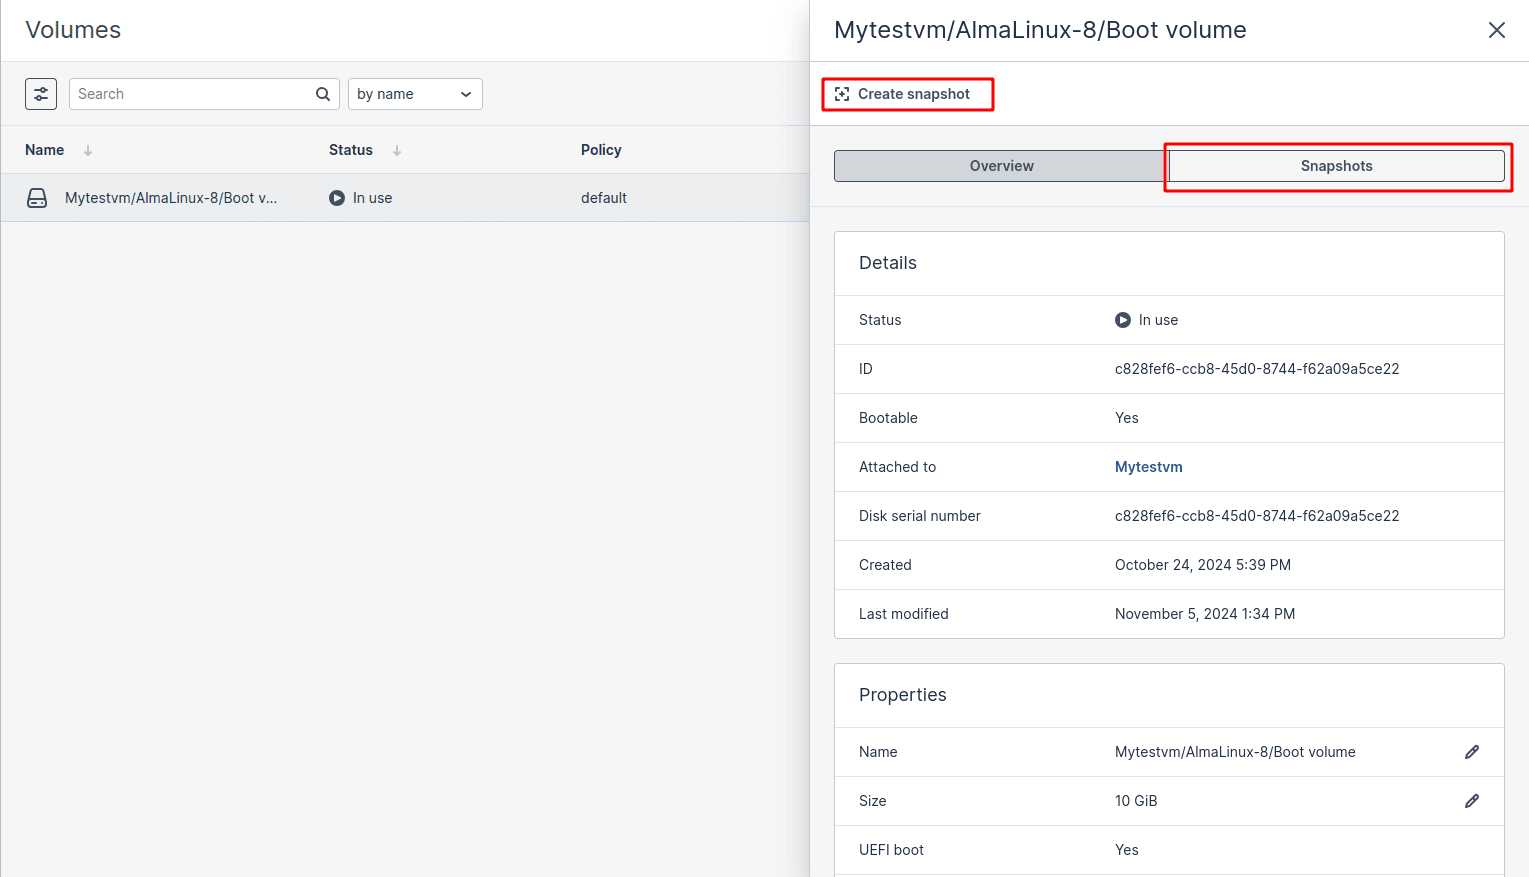
On the Volumes screen, click a volume. - In the volume right pane, switch to Snapshots, and then click Create Snapshot.
Managing Volume Snapshot:
Select a volume and open the Snapshots tab on its right pane.
You can do the following:
- Create a new volume from the snapshot.
- Create a template from the snapshot.
- Discard all changes that have been made to the volume since the snapshot was taken. This action is available only for VMs with the “Shut down” and “Shelved offloaded” statuses.
Note: As each volume has only one snapshot branch, all snapshots created after the snapshot you are reverting to will be deleted. If you want to save a subsequent snapshot before reverting, create a volume or an image from it first.
- Change the snapshot name and description.
- Reset the snapshot stuck in an “Error” state or transitional state to the “Available” state.
- Remove the snapshot.
To perform these actions, click the ellipsis button next to a snapshot, and then click the corresponding action.
Transferring Volumes Between Projects
There is no direct way to migrate a virtual machine between different projects. However, you can transfer the VM boot volume, and then create a new VM from it. You can transfer both boot and non-boot volumes to projects within different domains.
Limitations:
- You can only transfer volumes with the “Available” status.
- Transferring volumes that have snapshots breaks the snapshots.
Prerequisites:
- Access to the compute API depends on your provider’s settings. You need to obtain from your provider the instruction how to connect to the API.
- You have login credentials for the source and destination projects.
- If you want to transfer a boot volume that is attached to a VM, clone this volume first, as described in Cloning Volumes.
- If you want to transfer a non-boot volume that is attached to a VM, detach it first, as described in Attaching and Detaching Volumes.
Transferring Volume Between Two Projects:
- Log in to the source project by changing the environment variables to the project credentials. For example:
export OS_PROJECT_DOMAIN_NAME=domain1
export OS_USER_DOMAIN_NAME=domain1
export OS_PROJECT_NAME=project1
export OS_USERNAME=user1
export OS_PASSWORD=password
2. List all volumes within your project to find out the ID of the volume you want to transfer:
# openstack –insecure volume list
+————————————–+——————-+———–+————————————————-+
| ID | Name | Status | Size |
+————————————–+——————-+———–+————————————————-+
| 2c8386fa-331b-4ba8-9e4c-de690969a4c8 | win10/Boot volume | available | 64 |
+————————————–+——————-+———–+————————————————-+
3. Create a transfer request by specifying the ID of the chosen volume. For example:
# openstack --insecure volume transfer request create c0d4cf0e-48e3-417d-b6fc-f1fb36571c5f
+------------+--------------------------------------+
| Field      | Value                                |
+------------+--------------------------------------+
| auth_key   | 75fcf37d56f40182                     |
| created_at | 2022-04-27T09:00:11.776511           |
| id         | b9b835a3-ed41-489a-9552-483fae33c549 |
| name       | None                                 |
| volume_id  | c0d4cf0e-48e3-417d-b6fc-f1fb36571c5f |
+------------+--------------------------------------+
Save the request id and auth-key from the command output, to accept the transfer in the other proje
4. Log in to the destination project by changing the environment variables to the project credentials. For example:
export OS_PROJECT_DOMAIN_NAME=domain1
export OS_USER_DOMAIN_NAME=domain1
export OS_PROJECT_NAME=project2
export OS_USERNAME=user2
export OS_PASSWORD=password
5. Accept the transfer request by specifying the request ID and authorization key. For example:
# openstack --insecure volume transfer request accept --auth-key 75fcf37d56f40182 \b9b835a3-ed41-489a-9552-483fae33c549
Once the volume is moved to the other project, you can create a virtual machine from it, as described in Creating Virtual Machines.
